7.31.2008

A New Gear Head Bag

I was inspired by this contest at CraftStylish.com to create another fused plastic bag. I really liked the original, but for this bag I wanted it more tote-y. I was inspired by the LaRue bag in the Devil Wears Prada Movie, but I wanted something bigger and without that weird strap thingy.I have to admit that these are not the best pictures I have ever taken, but it was one of those "OMG the cut off time is in 45 minutes" kind of photo shoots. This bag measures roughly 16" x 22".As you can see, it is pretty good sized, I think that it will hold my sketchbook and pencil case, plus all the other miscellaneous crap that I like to take with me.Look, it's the fabric I stenciled yesterday! There is also a cell phone pocket and another small pocket on the bottom. On the top side there is a large zippered pocket. I used black thread to sew everything, I hate when I open a bag and everything is the same color and I can't find the pockets, maybe it's just me. This is my prototype, so I'll be carrying this one around for a while to see how it works and if passes you may be seeing a similar one in my etsy shop in a few weeks.


***Update: More Pictures in better light***

7.30.2008

Stenciled Gears

I have be working on a new fused plastic bag design and today I stenciled gears on to the lining using a freezer paper stencil.

Freezer paper is so awesome!!! It is easy to cut and just irons right on to the fabric, this gives the stencil nice crisp edges. I also iron freezer paper on the back so the paint doesn't seep through. I used regular acrylic paint mixed with textile medium to make a permanent design. I dabbed (straight up and down) the paint on with a make-up sponge. The paint needs to set for 24 hours and then it needs to be heat set with an iron.

While I waited for the paint to dry I cut coordinating appliques out of fused plastic dollar store bags.

Here's the finished design after peeling the paper off, I really like how it turned out.

Next I'll need to sew the pockets and zipper onto the lining and then I'll start constructing the bag. I also have a resin project curing that will also be used for this bag, but more about that later.

7.29.2008

Wordle - I Made a Word Cloud

I heard about Wordle through Kimberly Monaco Designs blog. Wordle, what's wordle you ask? it's this great site that helps you make word clouds.
The really great news about this is that you can do whatever you want with these word clouds, print them on shirts, make them into posters, make scrapbook pages, the list is endless. They are also just fun to make, there are several different fonts and the colors are customizable. You can type in your own words or enter a web address and they do it for you! I see a fog of word clouds in my future.

7.27.2008

Instant Cemetery - Finished

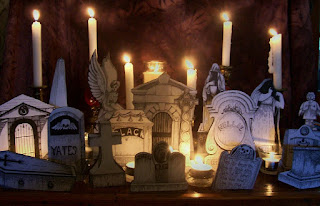
I finished my first instant cemetery set, complete with four new tombstones. It seemed like it took forever to get everything cut out, but everything else went pretty fast.

This is one of the new drawings and my favorite, I am really excited how this one turned out, super creepy.

Photographing the cemetery was a little difficult because I wanted to show it lit by candles. I think they turned out good.

I always make a matching tin to store everything in. I just shrink everything down and decoupage it on to the tin and then finish it with a satin finish sealer. I tried something new this time, decoupaging is supposed to be done with laser copies because ink jet copies run when you put the modge podge on. Here in the sticks where I live there really isn't anywhere to get a laser copy, so I used the satin sealer to seal the copies, it worked great there wasn't any smudging!!!

I think I'm going to keep working on new drawings for these, maybe I can make enough to have several different sets.

7.23.2008

Instant Cemeteries

Halloween is my favorite holiday and so there is a lot of Halloween crafting at my house. I have quite a large collection of Halloween books and magazines, a few years ago I purchased this book, Halloween: A Grown-Up's Guide to Creative Costumes, Devilish Decor & Fabulous Festivities by Joanne O'Sullivan.There are a lot of really great projects in this book, but my favorite was the instant cemeteries. I loved it the moment I saw it, but the instructions said to find clip art on the internet or in books and I just could not find anything I liked, so I decided to draw my own.

Here's the cemetery I sent irasema for the Halloween '07 swap (BTW thank you for taking such an awesome picture irasema!!!) These drawings were inspired by cemeteries that I've been to and pictures that I've seen. This is a set of eleven. I've decide to add a few more tombstones to the collection this year and so I have been looking at pictures online and from my collection.
Here are two that I completed last night, I still need to modify the sizes, but I think they will go well with the rest of the tombstones. Once I get all the drawing finished I mount them and put fold able stands on the backs and then I customize a recycle tin to store them in.