7.31.2009

Knitting, Knitting, All Day Long

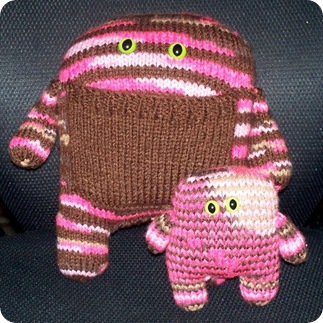
I bought Rebecca Danger’s pattern for Daphne and Delilah and have not been able to put it down.  I have not knitted a stuffed animal of any sort, so this was really a new experience.  I definitely need to practice my seaming/attaching techniques. 

The pattern was nicely written and easy to follow.  It was almost entirely knitting in the round, so lots and lots of knit stitches.  My monsters are a bit um…quirkier, yeah quirkier, than hers, but I like them that way ;).  I seem to have made everything a bit lopsided, but they are monsters, it just adds to their charm, right?

daphne and delilah This pattern is sooooo adorable, I will definitely be making more!  BTW leave me a comment if you have any tips for sewing up stuffies, I could use the help!

7.29.2009

Fancy Play Food Tutorial (the Easy Way)

My daughter recently received a doll house for her birthday.  It is a homemade one and doesn’t have a lot of accessories, so I decided we needed some play food.  There are a lot of really talented people making miniature food with polymer clay, but I don’t have time to hand sculpt fancy concoctions and I definitely don’t want to spend a lot of money buying something that can be easily lost or broken.

Materials:

  • Scrap polymer clay
  • acrylic paint, like apple barrel or folk art brands
  • acrylic sealer, I would use a spray
  • baby powder or cornstarch to use as a mold release
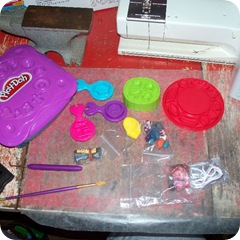
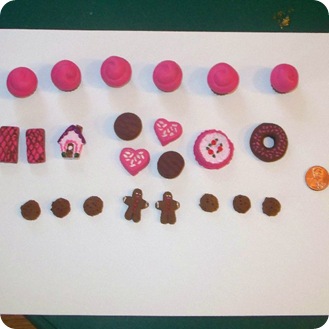
  • Play-doh sweet creations set (my daughter received this for Christmas, Play-doh has a lot of different sets and there are a variety of different shaped molds so check your sets, ask your friends and keep an eye out at yard sales, these molds work great for polymer clay).   The green and the red ones on the left are some that I found in our collection.play food supplies
Start by conditioning your clay, it need to be warm and soft to produce a good shape.  You can condition it by hand kneading or you can run it through the pasta machine a few times.

Use a brush to apply baby powder or corn starch to the inside of your molds.  Roll the clay into small balls and then firmly press a ball into the mold.  I use my thumb to really get it in there good.  There will be excess clay around the outside edge of the mold and this is what I use to pull the clay out. 

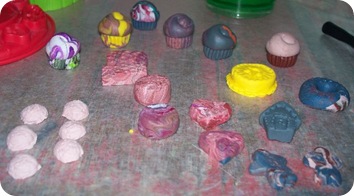
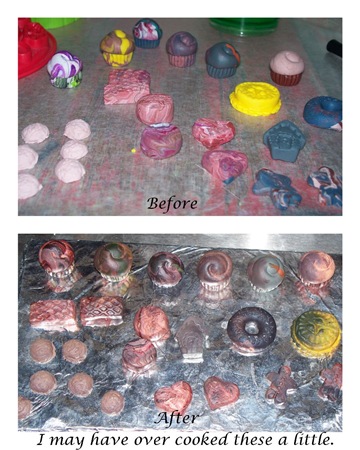
After removing the clay from the mold the bottoms can be rough.  I used my tissue blade to slice the excess clay off.  The piece can be easily sculpted and reshaped, remember this is just play food don’t make yourself crazy making it “perfect”.  Here they are ready for the oven.play food before Bake according to the package directions, mine were supposed to be baked at 275 for 30 to 40 minutes, but I must have bumped the temperature dial on my toaster oven because they came out looking like this.

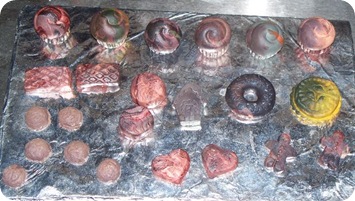
play food afterI guess it’s good I used scrap clay and was planning to paint them anyway :).

Paint your creations to make them look like real food and then seal with acrylic sealer.play food aboveI was able to whip these up in an couple of days (during nap time and such) and my daughter was delighted with them.  An older child would be able to help you make/paint the shapes, but it was a bit beyond my three year old abilities.  ***Always supervise small children with this play food as it can be a choking hazard.***

7.27.2009

Copper Mesh Wine Sleeve

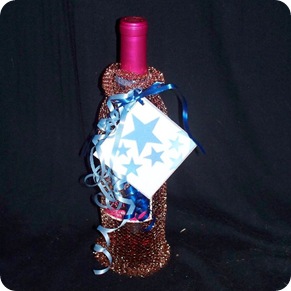
We all know that wine can be a great gift for may different occasions, but what is a good way to dress up the bottle and make it special.  There are fancy boxes and bags everywhere and they can really add to the price of a gift.  I was able to make this fabulous wine sleeve for less than a dollar.wine sleeve All you need is a package of copper pot scrubbers.  I was able to get a package of two at my local grocery store for $1.00. 

Figure out how your scrubber is wrapped up, this one had the ends twisted together and once I untwisted them it was easy to unroll it into a tube which slides onto any regular sized wine bottle. 

The one above is just plain, tied at the top with some ribbon and a card, but there are ways to dress it up a bit more.wine sleeve2 Dig some of those beads you’ve been hoarding and jazz it up a bit!wine sleeve3If you look closely, you’ll see this scrubbie is knitted, you might even be able to convince the recipient that you knitted it yourself :P.

7.26.2009

Overcooked?

I'm working on a new polymer clay tutorial. I hope this is not an indication of how my week is going to go.Over cooked

7.24.2009

Book Review: Gardens from Garbage By Judith Handelsman

I borrowed this book from my local library, (it appears to be out of print, but there are used copies available on Amazon).  This book is targeted to children and it is simply written and has interesting pictures and fun facts about plants to entertain and educate.

My children, especially my son, are really interested in plants and seeds.   Most of the plants in this book are common, except for the wheat berries, I have nooooo idea where one would buy those, maybe a health food store?  I liked that how the plants sprout and grow was explained and is was made clear that most of the plants would not bear fruit indoors and what could and could not be eaten.

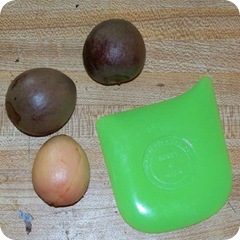
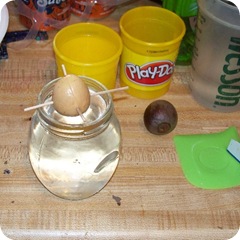
We have started our first project from the book, an avocado tree!avacado 1The seeds have to be dried overnight and peeled.  Peeling was hard, I found that the pointy bit of my pot scrapper worked great for removing the outer skin with out damaging the inner seed. avacado 2 The seed is then skewered and the bottom is immersed in water.  Now for a few weeks in the dark and we’ll see what happens.  I was hoping to start three seed, but one of them was damaged and broke in half when it was time to be skewered.
I am excited to see if anything will grow and if it doesn’t I’ll just be forced to make more guacamole to get some more seeds, wouldn’t that be terrible!
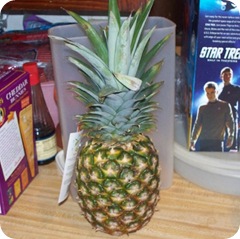
pineapple 1Guess what we’ll be planting next =D.

I did enjoy this book and it was a quick read, I would buy it if I found it on a yard sale or in a thrift store, but I am not inclined to purchase it for $10.00 online.  So thumps up, but don’t buy, borrow.  I’ll let you guys know how the avocados turn out
7.22.2009

The Undercover Crate and Scooby Doo

I don’t know about you, but I have a ton of milk crates.  They really are the perfect size for storing any and everything, but they are not cute, especially if you’re like me and have one or two of every color ever made and a few that are a little worn around the edges. 

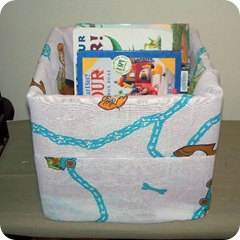
I have the answer make them into Undercover Crates!  This has been on my to do list for quite a while and if I had known how quick and easy this would be I would have done it ages ago.  I even had to adjust the size (don’t worry there are easy to follow instructions on how to do this) and it still only took about an hour.scooby crate I used a Scooby Doo sheet that I bought on a yard sale.  I need to take a minute here and rant a little.  This fabric was AWFUL, had I known how poorly woven and badly printed this fabric was I would not have bothered.  I have had enough of “character” sheets, they are all crappy, loosely woven and printed off grain.  I will stick to the regular sheets from now on.  Okay, moving on, I wanted to use something fun, this is now our designated library book crate, so that Mommy does not have to spend 30 minutes rounding up books when its time to go to the library.scooby crate inside

I really like how the pattern turned out, the instructions were simple and it was easy for me to customize the size.  The only thing I will do differently in the future is to make the seam allowances 1/2” instead of 1/4”, I like a little more to work with.  I will have to redo this one because of the fabric issue, but that’s fine.  I only have about 20 of these crates, I’ll just set up a little assembly line and go to town!  I think I’ll make a set for everyone in the family! 

7.21.2009

Blog Friends

One of the best things about blogging is meeting new, interesting people.  I often feel like I really know these people just because I read their blogs and have seen pictures of the families and homes. 

One of my blog friends, Pam, had a blog warming party last week(The Adventures of Pam and Frank), you may have noticed the button on my sidebar.  There were giveaways, recipes, and fun. 

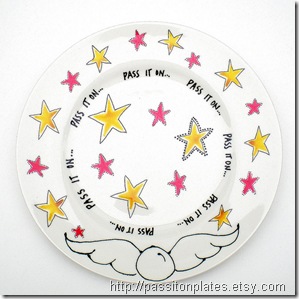
You also may have noticed the daily badges a little farther down on the side bar, that was part of the giveaways, collect all seven and be entered for a chance to win your choice of two Pass it On Plates loaded with rice krispie treats from Pam’s etsy store.  And guess what, I won.

pass it on plate stars I’m so excited, she’s going to send one to me and one to whoever I pick, hmmmm, who should I pick?

pass it on plate swirls The blog warming party was great fun, but I have to confess that I’m am more addicted to two of her other blogs: pamhawk, for all the wonderful blogging and business advice and pams-inbox for a little chuckle.

I’m getting to the point where I can barely keep up with all the blogs I read and my back log of projects to try is getting mighty long.  I think I’m going to have to learn speed reading!

7.17.2009

Friday Favorites

Here are a few of my latest favorite things (I know you guys are sick of seeing Chica Bag stuff, so this will be something fresh)!

favorite things7-17As always, from left to right and top to bottom:

1.  Day of the Dead Wedding Cake Topper – morbidcreations

2.  Pirate Vixen Corset – damselinthisdress

3.  Recycled T-shirt Rug – talkingsquid

4.  Minature 3D Mermaid Art in Vintage Compact – decorating4…you

5.  Miniature Clay Houses, Urban - thesistersstudio

6.  Sexy Science Fiction Girl Pouch – HautTotes

7.  Beer Box Book – repaper

8.  Enchanted Cat Bookplates – steelgoddess

9.  Daphne and Delilah Monster Knitting Pattern – dangercrafts

7.16.2009

My Crafty Chica Bag is Finished!!!

Yep, I finished it up today and I am still super excited about this contest! The bag came out just like I planned, yay! I would like to take a moment to thank all my friends and my family for not telling me to shut-up about this and being really supportive throughout my obsession with this project!

chica bag finished frontThis is the front of the bag, although it is really double sided.chica bag finished back The back with it’s glitter vinyl reverse appliqués.

chica bag collage And finally a collection of all the details. The inspiration for the basic shape of this bag came from Simplicity 2658, I made mine bigger and enlarged the handle hole. There is also one large zippered pocket, three open pockets and a heart shaped key keeper on the inside. I liked this design because it has an oval shaped bottom (with a plastic insert to make it hold it’s shape).

I had so much fun working on this project, what will I do with my free time now? Oh yeah, that’s right, I’ll pay attention to my family, do the dishes, and the laundry :).

7.15.2009

Freezer Paper Stencils, Mini Tutorial

I am still embellishing my Crafty Chica bag and I decided that the lining needed a little something. I didn’t want to hand paint something that is only going to peek out when I’m digging around in the bag, so the answer was freezer paper stencil. I love this technique and it is sooooooooo easy!

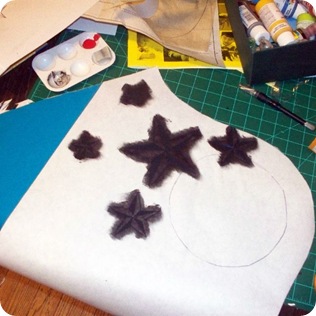
Get a big roll of freezer paper from the store, mine cost about $9.00 at a “big box” store. (I know it seems pricey, but it is worth it and it was also a really large roll.) There are images everywhere that can be used for stenciling, for my bag I googled “nautical star stencil”. I cut my freezer paper to match the shape of my bag and then traced the star images where I wanted them, make sure you trace them on the matte side of the paper. Since my design was simple it only took about 10 minutes to cut everything out with an exacto knife. Using an iron fuse the freezer paper to you fabric, it’s easy, just place the shiny side down and press with you iron until the paper sticks to your fabric. Make sure your cut edges are stuck down good!

chica bag star stencil 1 I like to use a cosmetic sponge to stencil with. Dab it into you fabric and pounce it on to the fabric in an up and down motion. Don’t rub it around, just up and down. You can always go over an area again, so don’t slop the paint on, I can’t say this enough, just dab! Remember to put scrap paper under you fabric incase the paint soaks through.

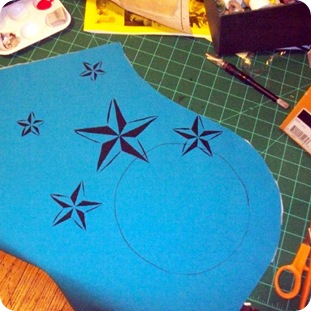
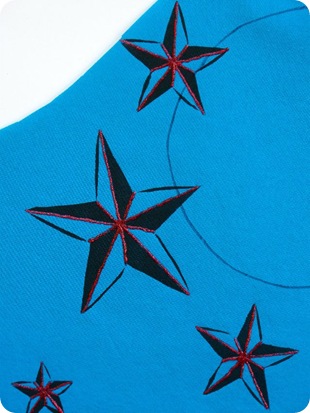
Wait a few minutes for your paint to dry and then carefully peel off the freezer paper.chica bag star stencil 2This was what I was going for, but it still needed something, I know, glitter!chica bag star stencil 4 I used red dimensional glitter fabric paint to accent the lines of the stars and once the bag is finished and the edges are wrapped in red binding it will really pop.

I need to finish some outlining and cut out the pockets and bottom and then I will finally be ready to sew!

7.14.2009

More of The Chica Bag

I worked on my Crafty Chica bag all day yesterday.  Layering the paint to get solid bright colors over that turquoise fabric took forever, but once I was finished with that I couldn’t wait to start embellishing!  I even went outside to take a “well lit, non blurry” photo for you to see.chica bag progress 6 I am still finishing the lettering and the buttons on the banner.  I also have to finish the lettering on the back piece, I might even have time to work on the lining.  Then I will be able to stitch it all together.  I’m sure by the end of the week everyone will be sick of seeing this bag, but I can’t help it, I’m obsessed.  See the other entries on Flickr.

7.13.2009

What I did this Weekend

Last week we had an appointment with the Lincoln Action group, they provide weatherization and during the inspection we discovered black mold in one of our basement walls. Well you know that has to be fixed. Luckily in was contained in a small wall, so this weekend we took the wall down. I cordoned off the area with plastic put on my mask and started ripping it down. My Father was here to help and Marma(my Mother) kept the kids busy. big DIY basement bathMost of the mold was growing on the back of the drywall and there is no way to get it off, so out it went! The mold was caused by moisture in the wall from an old leak that had already been repaired. big DIY basement bath2I sprayed the interior of the wall down with a mold killing spray, we have a dehumidifier running full blast, and in a few weeks when we’re sure the mold is dead and everything is nice and dry we’ll put the wall back up. We will be replacing one of the studs in the bathroom wall, installing an access door for the plumbing, and putting recessed shelving into the family room wall. And that swimming pool blue paint will get painted over too!

I have also been working on my Crafty Chica bag. I have finished the appliqués. Kelly (refibered) gave me a mini lesson on reverse appliqué at our Lincoln Handmade Team meeting last week. I have started the painting. I’m using regular acrylic craft paint mixed with textile medium, it’s taking a lot of coats to get good coverage, but it worth it.chica bag progress 1This is the back, I’m going to have to get a shot of these outside so the glitter vinyl is more noticeable! chica bag progress 2 Here is the front, I’ve finished the white areas and am building up the yellow and red areas.

Once the painting is finished I will be embellishing this further with dimensional paint, glitter paint, rhinestones and maybe some sequins. I also have something super special planned for the inside, so check back. The contest has been extended to the 24th., so there is still time for you to give it a shot! (See the Flickr gallery here.)

7.09.2009

Butterfly Hat Revisited

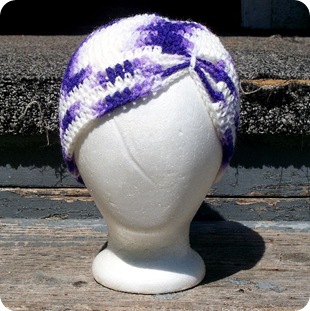
I was happy with my adult sized butterfly hat, but I still wanted to make one for Little Miss.  I went down to a G and whipped up a purple one and then I decided to go smaller.  I made the light blue one using an E hook.butterfly hat allI have to say that the variegated one seems a little busy now and the butterfly isn’t as noticeable.

butterfly hat blue

The blue one fits, but seems a little small and would always be falling off. butterfly hat purple

The purple one fits the best! and it seems to make her goofy, so it must be the perfect hat.

Once again I will have to say that this is a super cute and easy pattern, I’ll have to use some of my stash to make a few more of these for my craft show booths.

7.07.2009

Butterfly Hat

I found this darling pattern and decided it would be an adorable hat for Little Miss. I started working on it last night and frogged the first one because it was waaaaaaay to big. I went down to a H hook and started again.butterfly hat It turned out really cute, but it is still waaaaay to big for little miss although it fits me perfectly. I must crochet really loose. I will be trying this some more, switching hook sizes and maybe trying some different yarn. Hats are so fun to make, quick and easy and not a lot of sizing options!

I almost forgot, vote for this pattern for top crochet tutorial here!

7.06.2009

More Bag Sketches

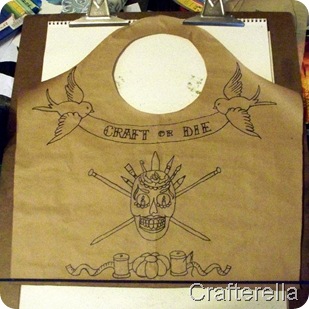
After considering the advice I received from Christy and Ashley I decided to redesign the front.  I pared it down a little bit (I was sad to get rid of the sparrows), so I could make the banner and skull larger.chica bag front 2I think I almost have it.  The skull needs to come down a bit and I might try to squeeze some scissors in there too!

I think the other design had too much going on and since it was smaller it would have been harder to embellish and there will be some serious embellishing!

Let me know what you guys think!

7.03.2009

Sketches for the Crafty Chica Challenge

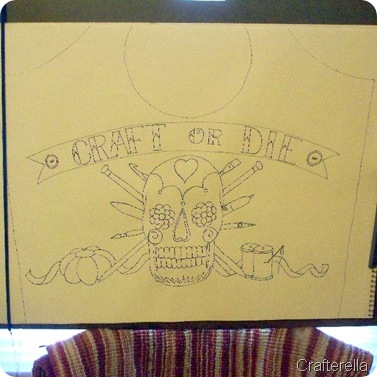
I am working on the painted design for my beach bag for the Crafty Chica Challenge.  I have the bag pattern all ready to go, but first I need to paint the design.  I want to use the “tattoo flash” style that I used for my back patch, but I wanted a new design.chica bag, front

This is what I have for the front, but I think it needs something else/more/different.  I like the top and the bottom, but I need to work on the middle.  I can’t decide if I should add more stuff, start over on the middle portion, or revert back to the design for the back patch.chica bag, back I like the back, maybe the front is just too busy.  I need some advice, what should I do with the design for the front and how does the shape of the bag look?  Leave me a comment and help me decide!

7.02.2009

Thrifty Thursday

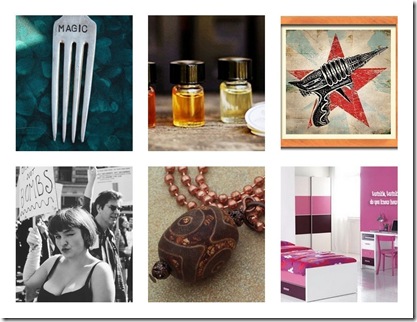
Do you ever need a little gift as a personal pick me up or a little present for a friend, then I’ve found what you need!  Everything is $5.00 or less (plus shipping) available now on Etsy.Thrifty Thursday collage

(As always, from left to right, top to bottom)

1. “Magic” hair fork – $4.00 by undeadmushroom12

2. Custom Perfume Sample - $5.00 by sweetanthem

3. Raygun Print - $3.80 by monstergallery

4. Bombshells not Bombs Postcard - $2.00 by susanhall

5. Tibet Necklace - $5.00 by WhirlingRainbow

6. Twinkle Twinkle Wall Decal - $5.00 stakersensations