4.30.2009

Simple Tawashi Flowers

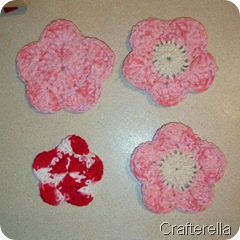
I found this adorable crochet pattern and just had to give it a try, especially when the instructions said you could whip one of these up in about ten minutes.flower tawashiI confess it took me a little longer than ten minutes, but I am not a crochet expert.   I used left over bits of cotton yarn and really a full ball would make a ton of these!  I think they’ll make good facial cleansing pads, yay for green products.

flower tawashi 2 I also have to share this little story about the yarn I used for these.  You know how once you tell your family and friends that you’ve started knitting or crocheting you inevitably end up with a garbage bag of red heart yarn?  At the bottom of my bag was this very interesting vintage 100% cotton terry cloth yarn that I have be attempting to use for years.  Terry cloth yarn seems like a good idea, but the texture of the yarn makes it impossible to frog anything (the picture does not do it justice), it just won’t come undone, but it’s cool.  I was able to use it by doubling it up with regular cotton and the result is awesome and super soft and spongy.  I will finally be using up all of this yarn for this project.

4.29.2009

More Mokume Gane in a New and Exciting Color

I think I need some sort of post title generator, I have the most boring titles. 

On Monday night I decided to make some midnight blue mokume gane.  mokume gane pendants 4I still need to drill or add bails to the squares, but I’ll leave them as cabochons for now.mokume gane pendants 2I had been waiting to get some smaller bails for these hearts, I really like the red one.

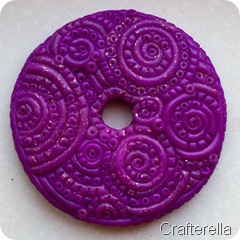
large dk blue donut3 This donut is my favorite from this batch, it is 2 inches across and so pretty I am thinking about putting a large bail on instead of wrapping it with the cord.  This photo does not do it justice, the layering is so difficult to capture with a camera!

Don’t forget that if you would like to make you own there is a photo tutorial here on my blog.  If you would rather have me make them for you, some of the pieces shown here are available in my etsy store, I also accept custom orders.

4.28.2009

How to Make Punched Tin Lanterns

We spend a lot of time outside once it finally gets warm and I am always looking for ideas to decorate outdoors.  I love making punched tin lanterns, they are easy to make, economical, and really pretty.

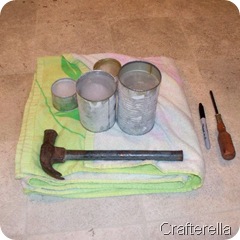
To get started you will need:

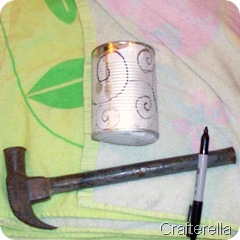
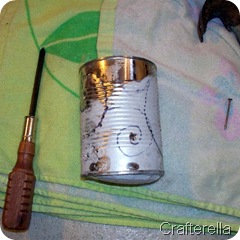
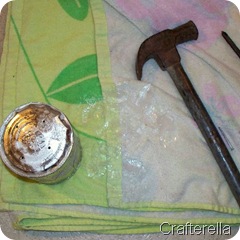
a variety of tin cans, washed out and labels removed, a hammer, a towel, different sized nails, screw drivers, metal punches, a marker, and spray paint/acrylic paint.tin can lantern 1Fill the cans with water and freeze overnight, the ice will support the can while the metal is punched.  Don’t fill the cans completely full.  I’m sure you know that water expands when it freezes, I forgot this simple fact and froze several cans into my freezer the first time I made these.tin can lantern 2Using a marker I traced a design on to my can.  You can also freehand you design or make a paper template from the label of the can.  It is best to keep it simple, swirls and geometric shapes look great, I’ve even seen jack-o-lantern faces for Halloween and they were super cute.tin can lantern 3Use your hammer and a nail, screwdriver, or metal punch to punch holes in you can.  Laying the can on a folded towel muffles the sound, keeps the can from rolling and soaks up melting ice.  Work from the bottom to the top because once you start punching near the top the ice will start to break and the can will dent more.  The bottom of this can bowed out a bit, but once I had removed the ice I just hammered it back in.tin can lantern 4I like to punch a few holes in the bottom, so if these are left out in the rain the water can drain.  I also like to weight them down with a little gravel or river rocks, I hate chasing after candles holders and lawn furniture when a storm blows in!tin can lantern 5Let the ice melt and thoroughly dry you cans to prepare for painting.  I like to paint my cans with flat black spray paint, but the color is up to you, I’ve seen some painted in a rainbow of colors and swirls and they were stunning (acrylic paints would be better for a rainbow effect, you would also want to seal them for extra protection).tin can lantern 6On the smaller can (on the left) the ice softened faster and the punches I made with the phillips screwdriver are more diamond shaped.  For a more pronounced X shape use a hard frozen can.
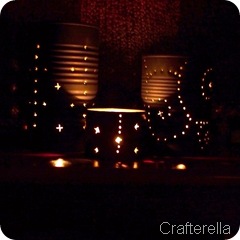
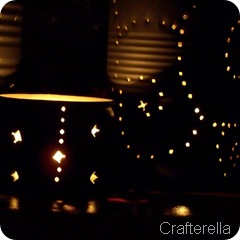
I hope everyone has a great time making punched tin can lanterns, let me know if you have any questions.  Make sure to share links to photos of your own lanterns in the comments, I’d love to see what everyone comes up with. 

***Disclaimer*** please use common sense when burning candles, blah, blah, blah don’t leave unattended, yada, yada, yada.  The candle holders may get very hot, use caution, oh and if they are left sitting in the same spot all summer they may leave a rust ring.
4.27.2009

I Made a Scarf

Now that the weather is getting nicer I’m in the mood to knit winter wear!  I was going through my yarn stash yesterday and I am officially grounding myself from the yarn store until I use up or give away some of this yarn.

dropped stitch scarf

I had quite a large ball of epais yarn left over from the Town and Country capelet that I made in December and so I decided to try an easy Mile a Minute scarf.  It worked up quickly while I watched TV and didn’t require a lot of attention to the pattern.  I really like the color of this yarn, it is much richer in person with flecks of orange and black.  It ended up about 5 1/2 feet long, not to bad for leftovers! dropped stitch scarf 2

I’ll have to put this away until this fall.  I think tonight I’ll work on some more washcloths.  It’s nice to have a stash of finished scarves and washcloths available for last minute gifts and filler at craft shows.

4.23.2009

Kind of a Long Story

Bear with me here, I promise there is a point to all this.  I was on twitter and Kathy Cano-Murillo (the Crafty Chica) tweeted about how this Sunday is Worldwide Pinhole Camera day and shared a link to the Craft Magazine blog for a template to make pinhole cameras and a great link to photojojo for more info on pinhole cameras.  Turns out that Craft Magazine is linking to Corbis Readymech Cameras where the actual templates are available for download.  I got a little side tracked looking at all the great stuff and while I have printed out my camera template that’s about as far as I’ve gotten, so I will just tease you with a picture of the camera that I’m working on.

pinhole camera peek

Oh and you can follow me on twitter here.  I’ll let you guys know how the camera turns out and I dare you to not get distracted looking at all those links!

4.22.2009

Fertility Goddess Shrine

I have been working on my entry for Christy’s Craft Challenge for a few weeks and I am finally finished. The first thing I did with my packet was to take the cloths pins apart. I was hoping to use the spring wire too, but it proved to difficult to bend and when I drew blood that was the end of it. After trying several different configurations I noticed that placing them backward resembled a goddess figure.

I used polymer clay to accent that and then began twisting strings from the burlap around knitting needles to make curly hair. Cereal boxes became the shrine box. I cut one inch strips and glued them together in a stack that I molded around a can and let dry. Once dry they retained the curve. I covered the inside of the box with the felt and painted the outside green. I embellished the edge by adding seed beads and vintage flower beads. I also added burlap to the outer arch for some texture. craft challenge 7The punched circles became mini works of art for the background of the shrine and rhinestones were added for that extra sparkle. The other cloths pin was cut to make little feet for the bottom of the shrine.craft challenge 6

I would have to say that my favorite part is the Goddess figure. I had a great time with this Challenge and I’m sure I will try it again. The prize for next month is a basket of stuff from the Lincoln Handmade Team, so order your packet now and maybe you’ll win some of our awesome stuff!!!

***BTW semifinals voting goes until April 24th at 5:00 pm go here to cast your vote.***

4.21.2009

Dusting Mitt

I enjoyed making the swiffer sock so much that I decided to make a matching dusting mitt.  Although I’m not above using my swiffer on the top of the entertainment center, I thought this might be a better idea.

frilly duster 2 I used the swiffer sock pattern and just made it a good length for my hand.  I single crocheted around the edge and then made rows of double crochet across the back making a long rectangle.  Then I just stitched the sides up and ta-da a dusting mitt to match my swiffer!

frilly duster 1I have to confess that my house is actually a huge mess, I’ve been spending to much time making cleaning accessories to do any real cleaning.

Tomorrow I will be unveiling my entry for Christy’s Craft Challenge there are some really great entries in the gallery on flickr already.  It has been really fun working on this, using stuff I normally wouldn’t have put together.

4.20.2009

Project Lisa is Finished

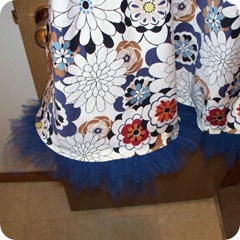
I finished all of the projects for Lisa and delivered them to her at the Lnkhandmade team craft night earlier tonight.  I repaired the zipper in this dress and added a tulle ruffle to the bottom.  I also made this wrap to go with it.

project lisa finished I really like how the outfit for her daughter turned out.  The summerlin dress in a shinier yarn with a crepe backed satin skirt and a matching shrug with a matching satin tie.

project lisa finished 2I am worried that it might be to long, but I also think it will look a lot different on an actual child instead of a hanger.  It can be shortened, so I’m not worried.

I need to wrap up my entry for Christy’s craft challenge and find a place to keep all the awesome fabric I got at the meeting tonight.

4.18.2009

I Made a Swiffer Sock

I was browsing OnePrettyThing this week looking for new projects to try when I came across this tutorial on CraftStylish for a Crocheted Swiffer sock.  I was so excited by the picture of the dirty sock I just had to make one of my own.  The shag like texture is amazing, I wish I could make an entire rug out of this stuff!

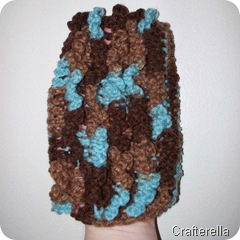
swiffer sock I am sort of a novice at crochet, so I opted to use one color of yarn.  I have an unnatural obsession with variegated acrylic yarn and I just had to get this blue and brown red heart yarn (earth and sky).  The pattern was very easy to follow and I had no trouble whipping this up in an afternoon.  There are even pictures of the different steps, and you know how much I like picture tutorials!

swiffer sock2It fits snugly, without being difficult to put on.  I have enough yarn to make another one to use while this one is in the wash.  I don’t know about you, but I have enough acrylic yarn to make a couple of these for everyone I know and still have enough left over for a rainbow afghan!  Who knew I would get so excited about making things for cleaning.

4.16.2009

How to Make Styrofoam Stamps

I remember making styrofoam stamps when I was in high school. Living in a small town made it difficult to get art supplies like linoleum blocks, cutters and printing ink. I came up with a lot of interesting projects; beads made from bread, sculptures out of mud, and styrofoam stamps.

I use meat trays, they actually aren’t that common anymore, now most meat comes in plastic trays (yay, they’re recyclable and great for craft projects!) This is a great project for kids, just leave out the exacto knife and it’s pretty safe, just cutting with scissors and a dull pencil.

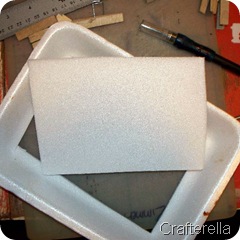
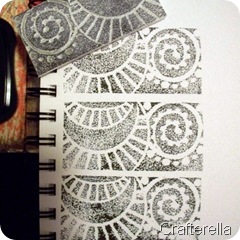
styrofoam stamps 1This came with the delicious Italian sausage that became a spaghetti pie. You can also use to go boxes. Make sure to wash the styrofoam before you get started. Cut the edges off, so you have a nice flat piece to work with. I used and exacto knife, but regular scissors also work.

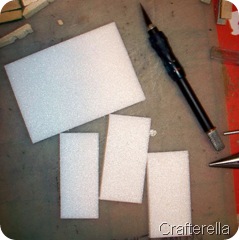
styrofoam stamps 2 I cut mine into smaller pieces, yours can be any size you want. The great thing about this project is that almost any tool can be used to make marks on the styrofoam. I used a dull pencil, but you could use a pen, a popsicle stick, a ball stylus, your fingernail, anything!!!styrofoam stamps 3 I used an ink pad to make the stamps (note to self, get another color of ink). The great thing about these stamps is you can also make a rubbing of them using printer paper and a crayon, the kids love this, it’s magic!

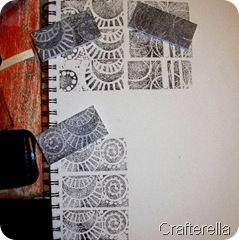
styrofoam stamps 4The texture of the styrofoam can be seen in the print. I like the effect, it looks like stippling or even a mono print. My favorite part about this project is that it is free, I would have bought the sausage regardless and now the tray won’t go to the landfill. BTW if you like this project you should try eraser stamps next.

4.15.2009

Beaded Flower Arch

After I looked at my enormous bead stash I decided to use these lovely vintage flower beads instead of the flower shrinky dinks that I had made for my entry in Christy’s craft challenge.  They just didn’t have the right look for this project.
craft challenge 5 I have used up most of the green felt and now I just need to decide how to use the green circles and the burlap, I know what I’m going to do with the rhinestones.  I really want to use as much of the stuff provided in the kit as possible.  I also need to beef up the bottom of the niche, it looks a little warped.  I may need to make a run to the Dollar Tree to pick up a couple or things, I would like to just use up stash for this, but we’ll see.  I’m hoping to finish this up this weekend so I can get it posted in the gallery before the deadline.

I also added a few new polymer clay pendants to my etsy store today, including the Balinese Filigree pendant from yesterdays post.

BTW Christy, I want an award for mentioning this a lot ;)

4.14.2009

Balinese Filigree Donut Pendant

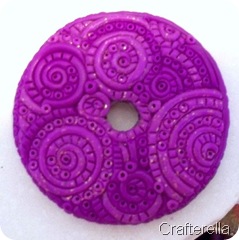
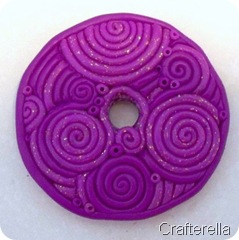
I had so much fun making a filigree donut for my swap partner in the bargain hunter swap that I decided to make another one.  I planned ahead for this one by covering a base when I made the violet mokume gane.

balinese filigree before baking

Having a base of clay to work on made the process go a little faster, it also made the pendant a little thicker.balinese filigree after baking

I like how it looks when all the snakes are applied, but it really starts to pop when the texture is added.balinese filigree finishedBaking the clay makes it a little darker.  I don’t usually do any sanding on filigree, just a good buffing with the dremel to give it a nice satin finish.  All it needs now is a gold bail and it’s ready to go!

4.13.2009

Homemade Shrinky Dinks

For this project you will need to buy a box of cookies in a deli container, I know it will be a sacrifice, but it's for crafts :-). On the bottom of the container there is a recycling symbol, make sure there is a #6 in the center. You can use the entire container, but I usually just save the flat parts(we eat a lot of cookies). I find them easier to store and flat is better for detail work. I lightly sand the plastic using a sanding sponge(regular sand paper works too), whatever grit you have handy is fine, and wipe off the dust. The sanding makes the marker or pencil stick better.
I used a sharpie marker to draw my designs. I have also used stamps. Make sure to give the ink a few minutes to dry.
Then cut out all of the shapes. I also used a 1/4" hole punch to make holes in the center of each flower. I did not color this batch before baking, but you can color your batch at this point using colored pencils or markers. Remember that the colors will intensify when they shrink.
I put them into my toaster oven at 350, it only takes a few minutes for them to start curling up and shrinking. Once they have flattened out again they are done. This batch was a little wavy and so when I took them out of the oven I smooshed them with a phone book.I used sharpie markers to color them and they are finished. I made these to use in Christy's craft challenge, but they weren't quite right. I will store them away with my other beads to be used in some future project.
4.10.2009

Waiting for Glue to Dry

I hate waiting for glue to dry! I am working on my entry for Christy's craft challenge and I have several things that need to be done, but the glue is drying so slowly.

I started out with four strips of cereal boxes, I then glued and stacked them and let them dry shaped around a can to get a nice arch. I cut a back piece out of another box and I'm using pins to hold the parts of the boxes together while they dry, the pin holes will be covered once everything is dry.

I have finished one of the clothespins, but I'm not sharing a photo until the project is finished and I have all my materials gathered for finishing. My theme for this project is spring and abundance, can anyone guess what I'm making?

I guess I'll work on my shrinky dinks. Did you know that clear plastic deli containers are the same plastic that shrinky dinks are made from?, I'll never have to buy them again, instead I can buy cookies :-)

4.07.2009

Circle Cloth

I just finished this little dishcloth using this circle cloth pattern. It looks more like a honeycomb to me, but whatever :).I made mine a little smaller and added a crocheted border. I used sugar n' cream hot blue and peaches and cream peppermint yarn. I don't know what it is about dishcloths, but I love to make them! I guess it's instant gratification and a good way to try new patterns.
And for those of you on the edge of your seats waiting to see what I'm making for Christy's craft challenge here's a little peek.
This is part of the burlap and one of the clothes pins being glued.

As promised, here's a cereal box being mutilated, I'm going to do some gluing later and maybe some shrinky dinks.

4.06.2009

Peer Pressure

After hearing how much fun my teams members were having I decided to join Christy's Craft Challenge. Christy gave me my packet at out Lincoln Handmade Team meeting. I can make anything I want, as long as I use a little bit of everything in the packet.
Thank you Christy (I stole her picture of what was in the packet). I like the green a lot, very springy and I have been working on ideas all weekend. My clothespins are already dismantled and I am looking through my stash for more green items like beads, embroidery floss, and glitter. I also need some cardboard, so I imagine that all my cereal will soon just be in bags ;) I'm going to be working on this all week, so I'll keep you posted!

4.04.2009

Mokume Gane Votive Holder

I've been thinking about what else I can put mokume gane clay on. Pretty much anything oven safe will work. I thought a glass votive holder would be interesting.
I used a heavy, thick glass holder to make sure the sanding process would be easy. It is really pretty when lit, it gives off a soft violet glow and you can see the flecks of gold leaf on the inside. This is my new favorite mokume gane covered item, but I still really like the donut pendants. I think I'm going to make a couple more of these and I also want to try some more tins. I just need to find the perfect shape!

4.02.2009

Martha Stewart's Encyclopedia of Crafts Giveaway

My friend Christy is hosting a giveaway for Martha Stewart's new book, she has five copies. All you need to do is visit her blog and leave a comment and help get the word out about her giveaway, how easy it that!
See this post to enter, and while you're there check out the rest of her blog, there are a lot of interesting product reviews, patterns, and interviews, good luck everyone.

4.01.2009

Eraser Stamps

Did you know that you can buy a pack of three erasers for a dollar? I bought three packs (hoarding, because they don't always have them). I also got a box of coin envelopes(not for a dollar), just because I like them.
I used my handy dandy linoleum cutter to carve them and now I have a double sided stamp and I can make more!!! I'm not sure what I'm going to do with these, but I like them. If you would like me to send you a set of six (3 of each design) send me an email, crafterella (at) hotmail (dot) com.