You know that extra special fabric you bought, the one that you hoarded for a year and a half before making it into anything and when you finally did cut into it you saved every last scrap, yeah, well I have a project for those scraps, Fabric and Felt magnets!!!
You will need:
- fabric scraps
- fusible interfacing, any weight that you have on hand
- felt
- promotional magnets, think insurance promos, calendars, etc.
- an iron
- a hot glue gun
- mesh press cloth or paper
Start by roughly cutting out your fabric motifs, you can also start with squares or rectangles if you’re planning to make shapes, letters, or numbers. Lay out you mesh press cloth or paper, this will protect your ironing board from the fusible interfacing. Lay you rough cut shapes, right side down on top of the press cloth. Now would be a good time to press your scraps and get all the wrinkles out. Roughly cut a square of interfacing large enough to cover the shapes and fuse according to interfacing directions.
 Peel fabric and interfacing off of press cloth or paper. At this point I cut off all of the exposed interfacing because I like to press everything again to make sure it is fused really well. The interfacing helps stop fraying, if you want your edges to fray skip this step. Trim fabric into desired shapes, for motifs leave a narrow border around the edge of the design. Match up the pieces with scraps of felt.
 Sew along the inside edge of the fabric, trim threads, and cut felt to shape. If you are using thin magnet sheets they can easily be cut to shape with regular scissors. I like to cut the fairly large, they are not super strong and I don’t want magnets sliding off the fridge when the door shuts.
 Hot glue magnets to the felt and you’re finished! The tattoo fabric still frayed, even with the interfacing, oh well. I need to finish up all the other shapes I cut out and fused, but I ran out of time.
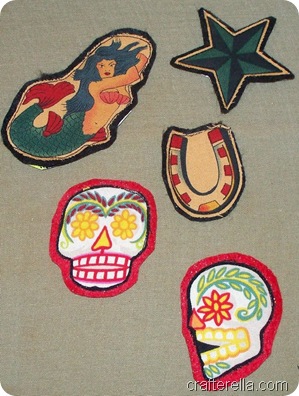 These are a great stash buster for those super special scraps. I might have to go back and add some glitter, dimensional paint, or rhinestones, they need a little “bling”. I think I need to make some sets of three or five to keep handy for little gift, it would be a great hostess gift or just for fun.


 I cut out everything and lightly glued down the words. Using a fine tipped pen, I outlined each word and then used Mod Podge to glue my collage to the lid and seal the paper. Once that dried I topped it with a layer of Dimensional Magic (from Mod Podge) to make it shiny and smooth (like resin, but water-based and not stinky). And finally, I added a magnet to the back and done! This was a quick little project that was really fun and art-y, I might soon cover my entire refrigerator with new magnets!


