Last night I was cutting out fabric pieces for a patchwork project and I discover something. Vintage fabrics that are in pristine, never cut condition make me sad. Fabric that was obviously bought to be made into something that was never used is just sad, especially when there is a lot of it. I was delighted to find the vintage mushroom fabric (the top piece on the right), it was a genuine scrap with jagged edges and random shapes of fabric left behind, someone made something fabulous from this fabric, yay!
And then it hits me, I have a closet full of fabric that has been bought for various uncompleted projects. I am not leaving fabric behind as a legacy for my children!!! I need to get sewing and no more fabric purchases until I work through some of this horde.
I have some interesting rules for this project: all fabrics used must be part of my scrap collection, every fabric must have a pattern of some kind, and no more than two pieces of the same print. I can't decide if this will be the most awesome patchwork ever or if it's going to be absolutely hideous (place your bets here on my Facebook page). I need 91 pieces for this project, 60 are cut. Honestly, I can't even tell that I have taken anything out of my scrap bins.
Oh, and this is what happens when I turn my back for a minute and why everything is covered in cat hair. I would also like to add the three hand made kitty beds go unused.
Showing posts with label sewing. Show all posts
1.07.2014
7.31.2012
Robes for Swim Lessons
Three weeks ago Little Miss, Little Sir, and Little Man started taking swimming lessons and I had big plans to make them all matching robes to wear after they got out of the pool. I had been wanting this robe pattern from Dana at Made ever since it came out and even though I knew it wouldn’t be big enough for Mr8 and Ms6 I still had to have it.
I altered the pattern to fit Little Miss and Little Sir by adding extra length in the sleeve cap and in the body. I could have also added width, but Little Sir is so slim I didn’t bother. The pattern went together smoothly, I did have a hard time matching the sleeves up to the bodies (even on the one I didn’t alter), but it may have been because the pattern shifted when I was cutting it. I ended up just cutting off the excess and every turned out fine. I would recommend that you use the alternate directions to attach the sleeve before sewing the side seam instead of setting them in.
Making my own bias tape turned into a big production for me. I have made bias tape before, but never on this scale. I used this bias tape tutorial so that I could sew everything first and cut it all to have one long piece (I also found the chart here (scroll down) helpful for knowing how much fabric to use to get the amount of bias binding I needed). It was all my fault, I didn’t have a large enough binding maker and I mis-measured the first round of tape and it was 1/2” to narrow. I ended up buying a larger binding maker and a clear ruler and that helped a lot.
I did feel like this project to FOREVER and they only get to wear them for their final week of lessons. However, I do think they turned out super cute and we have already gotten a TON of compliments on them. We will also be taking more lessons this fall after school start, so they will get plenty of use and they will look super cute hanging in the bathroom too!
I altered the pattern to fit Little Miss and Little Sir by adding extra length in the sleeve cap and in the body. I could have also added width, but Little Sir is so slim I didn’t bother. The pattern went together smoothly, I did have a hard time matching the sleeves up to the bodies (even on the one I didn’t alter), but it may have been because the pattern shifted when I was cutting it. I ended up just cutting off the excess and every turned out fine. I would recommend that you use the alternate directions to attach the sleeve before sewing the side seam instead of setting them in.
7.03.2012
Vintage Zinc Lid Pincushion Tutorial
I love using plastic bottle caps to make pincushions, so when I saw one made from a vintage zinc canning jar lid I knew I needed to make one to match my sewing machine set. I thought you might like to make one too, so I made this tutorial to share.
You’ll need:
Sew right sides together, all the way around (yep, all the way, do not leave a space to turn the fabric).
Clip seam allowance all the way around. Carefully and cut a small clip between the edge and center on the back side of the circle. It needs to be large enough to turn the fabric through and stuff stuffing into.
Stuff generously, when you think that it’s full enough add another handful(notice the stuffing, it’s puffing out of the hole). This will make the pincushion nice and firm. It will also make the cushion fit perfectly into the lid.
Get your floss on your needle and make a large knot about 3” from the end. Make a stitch through the center of the cushion, pull as tight as possible and knot.
Use the floss to divide the cushion into sections(I made 8 sections), pull the floss tightly and tie off again, but do not cut thread.
Sew the decorative button to the center to cover all the stitches, knot tightly again, and trim threads.
Use glue (or not) and stuff cushion into lid, it will fit perfectly with the seam lining up with the top of the lid. Admire your new pincushion! If you make one using my tutorial, I’d love to see a picture, share a link with us.
- vintage zinc lid
- scrap fabric
- fiber fill
- a matching button
- coordinating embroidery floss and needle
- misc sewing tools
Clip seam allowance all the way around. Carefully and cut a small clip between the edge and center on the back side of the circle. It needs to be large enough to turn the fabric through and stuff stuffing into.
Sew the decorative button to the center to cover all the stitches, knot tightly again, and trim threads.
6.29.2012
Fabulous Friday Find
The best thing I have found recently was a copy of Lutterloh’s The Golden Rule from 1969. I was buying lots of sewing notions and tools on ebay and it came in a lot of patterns, thread and other such items. It’s a simple red binder, but once I opened it up I knew I had something special.
This is a manual of pattern illustrations with the pattern pieces shown in the back with instructions on how to enlarge them to you size (based on only two body measurements). The company is still in business and you can order current designs from them. I have paged through this book numerous times and there is almost nothing that I would not wear. Everything seems to have a timeless quality about it. I am very excited to make something from this book, but there are so many designs to choose from I am having a hard time deciding.
Have any of you hears of Lutterloh’s?
4.20.2012
Getting the MOST from Kids Clothes
I have a confession: I don’t spend any time pre-treating stained clothing. Everything gets sorted, washed, and dried, if it ends up stained oh well! I know that a lot of you are probably appalled, but the reason I am like this is because I almost NEVER buy new clothes for the kids, almost everything is used or home made. Once in a while I will buy a “character” shirt or they will receive new clothing as gifts. The majority of their (and my) clothing comes from the Goodwill ($.99 sale) or yard sales.Just because I don’t worry about stains doesn’t mean that I want them looking like they are wearing second hand clothes, so thank goodness I can sew.
Now that spring is here it’s time to dig out all of the holey jeans, (second hand pants do wear through the knees a little quicker) and make some shorts. While one or two pairs of actual cut offs are okay, I will not just hack the legs off of all of their pants and let them fray. Today I re-did two pairs of jeans in two separate ways with almost the same results. The finished shorts look like they have always been shorts and will last through the summer (and may even be resold when they’re outgrown).
I have three pairs from Little Miss to fix, today I’m going to do a simple hem. Her pants were easy, cut off the legs and cut the hem off of the bottom of the legs. Sew the old hem to the newly cut shorts edge and topstitch over old stitching.
On the right you can see the finished pants compared to just cut on the left. Sewing that hem back on really makes all the difference.
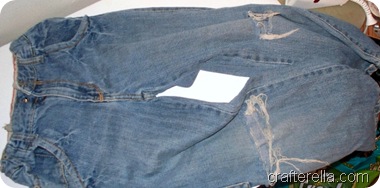
Little Sir’s pants were in the same shape. I like to make his shorts longer, it’s just a better look for him. I cut the pants off right at the holes and cut the hems off of the pants, but OH NO, these pants are tapered at the bottom and there isn’t enough to just match and sew!!! (This happens a lot) First I turned under the raw edge and hemmed the pants, then I cut the hem apart and sewed it on like trim. Once it is sewn on I trimmed the raw edge close to the stitching, there will be a little fraying, but it should just look like wear.
I know that it looks odd when I point it out, but if you don’t look closely (and most people don’t) it looks fine.
See? Hard to notice, right?
So this is how I really get my money’s worth out of pants. The top pair I got for a dollar AND she wore them all winter before I made them into shorts. Little Sir’s pair I got at a bag sale, a whole bag full of clothes for $2.00 (pretty sure there were at least 8 items in the bag), so $.25 for all winter wear and now all summer too!
I have a stack of pants to finish up today, Little Miss will be getting some stenciled (to hide some stains) shorts and Little Sir will have some patch-y (to cover some holes) shorts. Look for finished pictures on the Facebook page. Now I just need to come up with some shirts!
How do you get the most value out of your kids clothes?
Now that spring is here it’s time to dig out all of the holey jeans, (second hand pants do wear through the knees a little quicker) and make some shorts. While one or two pairs of actual cut offs are okay, I will not just hack the legs off of all of their pants and let them fray. Today I re-did two pairs of jeans in two separate ways with almost the same results. The finished shorts look like they have always been shorts and will last through the summer (and may even be resold when they’re outgrown).
So this is how I really get my money’s worth out of pants. The top pair I got for a dollar AND she wore them all winter before I made them into shorts. Little Sir’s pair I got at a bag sale, a whole bag full of clothes for $2.00 (pretty sure there were at least 8 items in the bag), so $.25 for all winter wear and now all summer too!
I have a stack of pants to finish up today, Little Miss will be getting some stenciled (to hide some stains) shorts and Little Sir will have some patch-y (to cover some holes) shorts. Look for finished pictures on the Facebook page. Now I just need to come up with some shirts!
How do you get the most value out of your kids clothes?
4.11.2012
Thrifted Sheet Dress
A week and a half ago I decided to cut into my favorite thrifted sheet to make a maxi dress using this youtube tutorial. It did not go well, the tutorial is very clear and easy to follow, but that much fabric on my curvy figure was a really bad idea, so bad that there are NO photos. It is a good concept and with some tweaking it could work, definitely less fabric than the width of the sheet. Basically it’s an adult pillowcase dress.
So my failed dress laid on the floor next to the ironing board all week and finally, this Sunday, I decided to start over. I picked McCalls 6114 (out of print. See, I knew I would need it someday). I am VERY excited with how this dress came out, so excited that I took bad My Space like pictures at 11 o’clock at night because I HAD to show you RIGHT NOW!!!
Boobzilla is looking a little rough, but she’s still an okay model when I don’t have a photographer handy. The reason that I am so excited is that I was able to sew this pattern directly out of the envelope, no alterations needed. Normally all tops must have a bust alteration because of the sizing on patterns (B cup, really?!?) This dress was different, the most fitted part is the high bust area and then it widens from there. Selecting the size that matched my high bust measurement gave me a dress that fits wonderfully in the chest/armpit area and is full enough (just barely) to fit over my full bust. Believe me, that whole perfect fit in the chest/armpit area is HUGE, normally there is some sort of gapping, pulling, or wrinkling involved in the bust area of my tops, hand made or store bought.
It lies flat and there is no gapping, there is also no giant cleavage showing.
The only “major” alteration I made was to position the casing for the elastic differently than was marked on the pattern and that was easy. I also made sure to mark my pattern, next time I’ll just trace it on.
The top, upward slanting line is the original suggested placement. The darker wavy line is my custom placement.
I can’t wait to make this pattern again! I need at least one more maxi dress and a couple of tops. The great thing about this pattern is that if you use French seams on the side seams all of the raw edges are completely enclosed, I LOVE that.
The most difficult part of this pattern is sewing the “V” part of the yolks together in the front, it took me a couple of tries and it’s still a little pucker-y. I also really like the use of bias binding to make the casing on the inside for the elastic. I currently have my elastic sewn loosely (trying to de-emphasis my tummy), but it can be easily adjusted.
Now to find some fabulous fabric to make more!
So my failed dress laid on the floor next to the ironing board all week and finally, this Sunday, I decided to start over. I picked McCalls 6114 (out of print. See, I knew I would need it someday). I am VERY excited with how this dress came out, so excited that I took bad My Space like pictures at 11 o’clock at night because I HAD to show you RIGHT NOW!!!
It lies flat and there is no gapping, there is also no giant cleavage showing.
I can’t wait to make this pattern again! I need at least one more maxi dress and a couple of tops. The great thing about this pattern is that if you use French seams on the side seams all of the raw edges are completely enclosed, I LOVE that.
The most difficult part of this pattern is sewing the “V” part of the yolks together in the front, it took me a couple of tries and it’s still a little pucker-y. I also really like the use of bias binding to make the casing on the inside for the elastic. I currently have my elastic sewn loosely (trying to de-emphasis my tummy), but it can be easily adjusted.
Now to find some fabulous fabric to make more!
3.16.2012
Fabric Memories
I found the journal cover I made using Teesha Moore styled fabric pillows. It’s been almost two years since I finished the cover and there is no journal inside. I love the fabrics I used and all the stitched textures. I really want to make these into something I use, so I took my cover apart.
I saw these beautiful photo books and binders that PhizzyChic made over on Craftster and I think that is more the route I need to go. I will need more pillows, so I dug through my stash and found a good selection to work with.
I’m not a scrapbooker, but I got to thinking about all the memories I have in fabric and so I thought I would share some of them.
Here are the new pillows that need to be stitched: 1. One of the first dresses I ever made (it was awful, wonky buttons, poor pressing, loose threads), 2. Little Miss’s toy sack, 3. Little Sir’s toy sack, 4. an apron, a top, and several other projects, this is a personal favorite of mine, 5. the sewing machine cover, 6. Little Miss’s bassinette, 7. One of my first hand dyed fabrics, and 8. I love this fabric, have made two different tops from it.
Here are the ones I finished two years ago: 1. Little Sir’s curtains, 2. Little Miss’s curtains, 3. apron for Little Miss, 4. Little Man’s car seat cover, swaddlers, and boppy cover, 5. Sketchbook cover lining, 6. Reconned caften fabric, and 7. another personal favorite fabric. These are the pillows I was working on while we waited for Little Man’s arrival. I was even working on them in the hospital.
What kind of crafty memories do you have? I think I might need a swatch scrapbook! Have a super crafty weekend!!!
I saw these beautiful photo books and binders that PhizzyChic made over on Craftster and I think that is more the route I need to go. I will need more pillows, so I dug through my stash and found a good selection to work with.
I’m not a scrapbooker, but I got to thinking about all the memories I have in fabric and so I thought I would share some of them.
What kind of crafty memories do you have? I think I might need a swatch scrapbook! Have a super crafty weekend!!!
3.09.2012
Wookies for Everyone!!!
Well at least for my three kids. I fell in love with this Chewbacca stuffie pattern from Draw Pilgrim and have been wanting to make one for each of the littles. I used three different fabrics to make each wookie a little different, that way we all know which is which. There are all nicely cut out and ready to be sewn up this weekend.
Do you remember that fairy tale about the poor cobbler who would cut out leather for shoes at night and find it sewn up in the morning? They discovered elves were sewing the shoes…I need some of those elves to visit me! I would make them some fabulous clothes if I could get them to sew up all my projects for a month!
I have been busy with other things too, we were lucky enough to rescue 2 vintage wood desks from the dump and there was a flurry of cleaning to make room for them in the much cluttered basement. They are huge and wonderful and luckily there was a 1/2 inch of clearance to get them in the door and down the stairs. I can’t wait to finish cleaning and arranging the basement, it’s going to be awesome.
Have a super crafty weekend
2.13.2012
The Lego Play Mat
We have a ton of Legos around here and that means that I end up stepping on one at least a couple times a week. Little Sir’s favorite place to play with Legos is in his bed. It is not unusual for him to wake up in the morning with a Lego print on his skin somewhere from the tiny Legos that have hidden in his blankets.
To solve (or probably just help it happen a little less) this problem I decided to make a Lego Play Mat using this tutorial from Make it Perfect. Not to be left out Little Miss asked for one too and I also made a few (four) for a friend. I used some specialty fabric for Little Miss and Little Sir and for my friend I used thrifted sheets.
This is a simple project that most beginner sewers should be able to do, the instructions are very clear, and there plenty of pictures for reference. I would suggest that after cutting your first circle to place it’s right side facing the right side of the lining fabric. Then fold it up and set it aside until you’re ready to sew. It didn’t occur to me to do this until after I had cut out my 12 circles, which weren’t exactly perfect, and matching them up proved to be a bit tricky and some of the circles had to be trimmed.
I am very excited to have the projects finished, I’ll be giving them to the kids after school I hope they’ll really like them and Yay, this is another Pinterest project!
To solve (or probably just help it happen a little less) this problem I decided to make a Lego Play Mat using this tutorial from Make it Perfect. Not to be left out Little Miss asked for one too and I also made a few (four) for a friend. I used some specialty fabric for Little Miss and Little Sir and for my friend I used thrifted sheets.
2.06.2012
My Little Pony Jumpsuit Lounger
Or what I’ll call a custom Forever Lazy. I used McCalls 6475 and My Little Pony licensed fleece. Booties that Velcro on are included on this pattern, but I opted not to make those.
Everything went together smoothly in an evening. The instructions were very clear and the order of sewing things made everything easy. This would be a good beginner pattern because it is mostly straight sewing and fleece is so easy to work with, the most challenging part is installing the zipper and there are very clear instructions that include hand basting to make sure it’s in the right place and doesn’t slide around when you do sew it on with the machine.
The fabric yardage recommendations are pretty good with plenty of room to arrange and cut out the pieces. The yardage includes fabric for the jumpsuit and booties, since I didn’t make the booties I had enough fabric left over to make a drawstring bag.
I definitely recommend this pattern, I will be using it again. I think it would be great made out of cotton terry cloth. The pattern is available in children’s and adult sizes.
8.17.2011
Finished Backpacks
I finished these up Monday night, just in time for school to start on Tuesday. They were a big hit and they should hold up for the whole school year! Special details include a super reinforced hanging loop, tabs instead of eyelets for the strings, boxed bottom corners to make the bags look better when full, and bead embellishments.
They look like they been lined up to be shot in a small swarm of half finished man eating ladybugs. The first day of school shots were a complete failure. I don’t know what it is about trying to have a nice picture of them that brings out the worst faces, sad they are trying to look cute, needless to say I won’t be sharing any of those shots. BTW, any suggestions on photographing children so they look natural would be great and let me know if you’d like a tutorial for these bags, I might need to make one for Little Man too!
7.18.2011
Draw String Bags (Days for Girls)
I mentioned (in January) that I wanted to make some kits for Days for Girls and that was it…things came up, I was busy and I haven’t worked on any kits since. I was really hoping to be long done with my goal of 12 kits for the year, but here I am. So, I am going to stop beating myself up over not finishing when I though I would and just do it, the year isn’t over yet. I originally finished 12 shields, which is enough for six kits. Tonight I made 6 draw string bags. Now, if I make 60 liners I’ll have 6 kits done. The are just rectangles, I can cut those with a rotary cutter and cutting all of them out is my next goal.
Tip of the Day: One of the best time saver I’ve been using is the Straight folding template from the Scientific Seamstress. It has really streamlined my sewing process, much better that a seam ruler.
I also want to remind you that if you have the time there are many different things that can be sewn for Days for Girls and any parts of kits are welcomed and if you don’t sew they also need panties, washcloths, and soap.
7.13.2011
Fashion Repeats Itself?
So I know that fashion trends are constantly recycling looks from the past. Today, while I was browsing through my pattern collection, I found this:
This is one of the first patterns I ever made, back in high school Sewing 101. I remember I got to buy navy blue tie dyed fabric at Loper’s, the fabric store in the next town over. It wasn’t the best sewing I’ve ever done (no raw edge finishing, sloppy sewing), but I loved it and wore it for years. I may have even wore it out, I know there was a lot of stress on the front V neck and it did start to rip.
So can I pull this look off now?, I know it probably isn’t the most flattering silhouette for my apple shape, but it would be comfortable and cool. I am also trying to stop wearing yoga pants and tank tops everywhere, is this better? You’ll also notice that it has pockets, a big selling point! This is my answer for the romper trend, I’m thinking view B, probably NOT tie dye (maybe tie dye wouldn’t be that bad?), maybe a solid colored knit fabric? Thoughts?
7.06.2011
The Bandanna Dress
I loved the bandanna pants so much that when I saw the 15 minute dress tutorial on Trey and Lucy I had to try it.
All you need to know is if you sew and know a little girl you should make at least one of these!
They ARE quick, I made three in an hour while also carrying on two separate conversations on twitter and doing some light cleaning. These are for a friend, I made one for Little Miss too, it has skulls on it, but she refused to model it. I can’t believe we have already started arguing about what she should wear, I can’t wait until she’s a teenager!
I also spent yesterday editing some cemetery photos. I going to put them in my store for the Halloween season.
I just can’t decide if I should make them into tags, postcards, or prints. I would love to get your opinion, leave your thoughts in the comments.
I also spent yesterday editing some cemetery photos. I going to put them in my store for the Halloween season.
6.24.2011
Giant Dry Erase Calendar Tutorial
I finished up my calendar and now that I am 100% happy with it I’m going to share how I made it.
The basic supplies:
I applied a bead of glue around the edge of the backing board and spread it thinly with a brush and then applied the fabric, stretching it slightly and holding it in place with the bulldog clips while the glue dried. You don’t want to saturate the fabric with the glue, you just want to tack it down. Once the glue it dry trim off any excess fabric from the edges.
Cut your scrapbooking paper, you’ll need 35 - 3 1/2” X 3 1/2” squares, 2 – 3 1/2” X 10 1/2” rectangles, and 1 – 2 1/2” X 12” rectangle. The easiest way is to use a paper trimmer or rotary cutter, but scissors can be used in a pinch. I also punched 35 – 1” circles for the dates.
On my first attempt I rounded the corners of the squares, but the second time I did not, it made lining up the grid easier. I used glue dots to affix the circles to the corners of the squares. Then I started arranging the squares that I also tacked down with glue dots. I started in the lower left corner, 2” in from the left side and 1” up from the bottom. Working across the bottom row, I positioned seven of the squares 1/2” apart. At the end of this row I added one of the 3 1/2” X 10 1/2” rectangles 1/2” from the final square. The next row of squares was 1/2” above the first row. I used a clear ruler to make lining up the rows easier. I added all five rows this way and also added the other 3 1/2” X 10 1/2” rectangle 1/2” above the first one. The title rectangle ( 2 1/2” X 12”) was positioned 8 3/4” from the left edge and up 1/2” from the squares. Lining up all the squares was the most time consuming part of this project.
Now you can put your poster frame back together. Remember to remove the plastic coating on the Plexiglas, mine had a coating on both sides! The calendar is finished, just start filling in you numbers and appointments OR we can make it a bit fancier.
I opted for fancier. I used printable window clings to make the months, dates, and some standard things that I would have on my calendar (like Doctor, No School, etc.). I used a basic word program to type everything out, picked out a fun font (Beyond Wonderland) and printed the clings according to the package instructions. Everything had to be cut out, but my paper trimmer made that quick. I stuck all the dates on, the extras are stored on a page protector that I have stuck on the back of my calendar. I used Velcro fasteners to stick my calendar on the wall, so I can take it down and lay it flat to fill it out for the month.
The printed clings make the calendar so neat and tidy. I followed Bonnie’s suggestion on the Facebook page, to hide the clutter, I can’t afford a new piece of furniture right now, but I CAN cover the piece that is there.
I barely had enough fabric to make the top match the calendar (there is a small stripe of brown at the back, I was about 2” short). Yes, hiding it is much better. The same stuff is under there, but it really looks a lot better, thanks Bonnie! Now I need to organize that organizer :P and work on the matching paper organizer that is going to hang under the key rack (that is why the table and calendar aren’t perfectly centered on the wall).
Have a super crafty weekend! and if you need any clarification on this tutorial just ask.
- 24” X 36” poster frame, get one with chip board backing (instead of cardboard) Hobby Lobby half price $9.99
- 2/3 to 1 yard of fabric, I bought a remnant and had extra that I used for the table cover
- 5 sheets of 12” X 12” scrapbooking paper to coordinate with fabric, plus scrap or 1 sheet for number circles
- basic craft supplies, white glue, glue brush, scissors, glue dots, ruler, bulldog clips
- printable window clings
- Rotary cutter and mat
- 1” circle punch
Cut your scrapbooking paper, you’ll need 35 - 3 1/2” X 3 1/2” squares, 2 – 3 1/2” X 10 1/2” rectangles, and 1 – 2 1/2” X 12” rectangle. The easiest way is to use a paper trimmer or rotary cutter, but scissors can be used in a pinch. I also punched 35 – 1” circles for the dates.
The printed clings make the calendar so neat and tidy. I followed Bonnie’s suggestion on the Facebook page, to hide the clutter, I can’t afford a new piece of furniture right now, but I CAN cover the piece that is there.
Have a super crafty weekend! and if you need any clarification on this tutorial just ask.
6.22.2011
WIP (Work in Progress) Wednesday
There is so much going on around here, Summer is officially here and we have been super busy. I have so many ideas I can’t write them down fast enough and having the whole crew home makes producing crafts slow, but this is our quality family time (they are already whining about how bored they are and that we never do anything).
I have managed to get a little more knitting done on the mantelet, I am almost back to the point where I had to frog it last time (fingers crossed that it will fit better).
I’ve finished another Pieced Tunic, seriously this is my new Mom uniform. I’m going to need some more leggings, STAT!
My giant calendar is almost finished and later today I’m going to tear down the white board and the cork boards. I’m am soooooo excited, I can’t wait to share the tutorial with you. I had to do MATH, but don’t worry, I took notes so you’ll just have to follow my directions.
So while I feel like nothing is getting done, really I’m making progress on various projects. What are you working on this summer? and how do you find time to craft independently with kids around? I’d love some suggestions.
6.06.2011
Kids Unisex, Inexpensive, Lounge Pants
When you have a boy and a girl there are very few hand me downs, maybe a coat or Halloween costume, but the regular daily clothing is so different and color specific that there is virtually no cross over. These pants aren’t like that (unless you make them in pink or something) and they are so easy, I whipped these four pairs up in an hour and a half, including pressing, cutting, and sewing!!! The key is using bandanas, the edges are finished which cuts out a lot of work and bandana prints look cute on everyone.
There are tons of tutorials on making these pants and they pretty much are all the same, stack your bandanas up, fold them in half, cut a “J” shaped crotch and sew up (more detailed instructions here). It is easy and inexpensive to buy bandanas, I bought the red/black and the yellow at Hobby Lobby (on sale) and the other two at Wmart, all were less than a dollar each. The Hobby Lobby ones feel stiff and might be scratchy, I think they are starched. I am hoping that after the first wash they will feel a lot nicer. The printing is really irregular on all of them, which makes it impossible to match things up, but I don’t really think that is going to be too big of a problem, they’re lounge pants, not formal wear :) I also think that when they are being worn by children who rarely stand still no one will notice.
They are sooooo cute, I’m thinking there are only two problems, deciding who gets what color and not going overboard making a ton of these.
6.03.2011
The Pieced Tunic from Lilblueboo Review
After looking at all my wishes Wednesday I decided it was time to get working on them. First up the Pieced Tunic from Lilblueboo, I am a huge fan of her patterns, but this one is her first adult sized pattern, would it be awesome too? I love all of her sample garments, I wonder how she decides what t-shirts to use? Maybe she just throws them all in a heap and randomly grabs them.
After taping and cutting out this pattern I decided to alter it to be a bit bigger. I really like the fitted, body skimming look. I did not want to look like a sausage stuffed into this top. I used the slash and spread method to add to the front and the back. The great things about this method is that the arm and neckline stays the same length, so I didn’t have to alter the bands length too. This pattern was super easy to alter, no darts or other shaping to redraw. I also added some length to the top pieces, I hate when my empire waist hits mid-boob.
As you can see, I added a lot, but too much fabric is way better than not enough. I did error on the side of too much, but the finished garment is still very wearable. It is sooooooooooo comfortable and flattering too, this may be my new uniform. The pattern went together quickly and the instructions were very thorough. If you like the pieced look this is the pattern for you. I think I will be using up some of my hoard of $1.00 shirts.
I will have some modeled shots up on Facebook later (after my new dryer gets delivered and installed and I have time to get my tripod set up).
When I make this pattern again (and I will be making several more of this top) I will be changing up some of the alterations, taking the back in a tad, taking a little off the length, topstitching the neck/arm bands, and sewing the armbands on a little differently.
This is the kind of pattern that makes me wish I had a serger, I would churn these out at record speed. So, in conclusion, I LOVED the finished results, you should definitely get this pattern!!!
After taping and cutting out this pattern I decided to alter it to be a bit bigger. I really like the fitted, body skimming look. I did not want to look like a sausage stuffed into this top. I used the slash and spread method to add to the front and the back. The great things about this method is that the arm and neckline stays the same length, so I didn’t have to alter the bands length too. This pattern was super easy to alter, no darts or other shaping to redraw. I also added some length to the top pieces, I hate when my empire waist hits mid-boob.
This is the kind of pattern that makes me wish I had a serger, I would churn these out at record speed. So, in conclusion, I LOVED the finished results, you should definitely get this pattern!!!
5.25.2011
Imperial Trooper Jacket
I absolutely LOVE making clothes from upcycled t-shirts! It seems like I am constantly bookmarking new projects to try. The t-shirt to spring jacket tutorial from I Am Momma – Hear Me Roar was one of the projects on my very long list. I seem to always be making stuff for Little Miss, but not that much for Little Sir. When I found this Imperial Trooper t-shirt I knew I had to use it to make him a jacket. I actually purchased a brand new shirt to cut up just for him and his love of all things Star Wars.
The shirt was an extra large adult shirt, so instead of using a premade boys shirt I made my own. I used the Sienna dress pattern from Lilblueboo like I did with the Little Man shirt, adding a bit of width to the body and a little length to the sleeves. I also used the custom screen printed fabric I made Monday and fabric that I discharged dyed years ago.
I really like how it came out, I’m not so sure Little Sir likes it though. He hasn’t wanted to wear it to school, but it has finally gotten warm. I’m hoping that by this fall it will be a little less roomy and he’ll be a lot more excited to wear it.
5.20.2011
From Sketch to Garment
Subscribe to:
Posts (Atom)


