Showing posts with label Organized. Show all posts

8.08.2011

Organized – Labeling Boxes

I spent some time yesterday doing some long overdue cleaning.  Mostly I sorted and filed away all of my patterns.  I had plenty of boxes, I just needed to take the time to sort them out by company and put them in numerical order. 
Today I want to share how I label my boxes.  I used to use a marker to label them, when I got a little more organized I would type up label and stick them on, now I number them.  It is very hard to see in this picture, but there are numbers in the upper right corners of every box.pattern storage boxesOn the bottom left is my master list, each number is labeled with what is in the corresponding box.  My favorite part of labeling boxes this way is if you change what’s in the boxes you don’t need to re-label them, you just edit your master list!  Another bonus is that, if your list is put away, no one knows what is in you boxes, perfect for hiding presents!
I also made some back to school stuff for the kids, the big project was these graffiti style shoes.back to school painted shoesThey are both excited to wear them and I am delighted that they came out so cute.  I followed the Graffiti Shoe tutorial from LilBlueBoo.  When I randomly painted the bright colors on over the white I have to admit I thought I had ruined two perfectly good pairs of plain shoes, but they came out great in the end.
I have several more projects that I want to work on, but if I’m still in cleaning mode I’m definitely going to go with that!  One week until school starts, oh my!

6.24.2011

Giant Dry Erase Calendar Tutorial

I finished up my calendar and now that I am 100% happy with it I’m going to share how I made it.giant calendar 1The basic supplies:
  • 24” X 36” poster frame, get one with chip board backing (instead of cardboard) Hobby Lobby half price $9.99
  • 2/3 to 1 yard of fabric, I bought a remnant and had extra that I used for the table cover
  • 5 sheets of 12” X 12” scrapbooking paper to coordinate with fabric, plus scrap or 1 sheet for number circles
  • basic craft supplies, white glue, glue brush, scissors, glue dots, ruler, bulldog clips
Some extras:
  • printable window clings
  • Rotary cutter and mat
  • 1” circle punch
I took my frame apart and set the frame pieces and Plexiglas top aside.  I laid the backing on my fabric and cut it to size.giant calendar 2I applied a bead of glue around the edge of the backing board and spread it thinly with a brush and then applied the fabric, stretching it slightly and holding it in place with the bulldog clips while the glue dried.  You don’t want to saturate the fabric with the glue, you just want to tack it down.  Once the glue it dry trim off any excess fabric from the edges.
Cut your scrapbooking paper, you’ll need 35 - 3 1/2” X 3 1/2” squares, 2 – 3 1/2” X 10 1/2” rectangles, and 1 – 2 1/2” X 12”  rectangle.  The easiest way is to use a paper trimmer or rotary cutter, but scissors can be used in a pinch.  I also punched 35 – 1” circles for the dates.giant calendar 3On my first attempt I rounded the corners of the squares, but the second time I did not, it made lining up the grid easier.  I used glue dots to affix the circles to the corners of the squares.  Then I started arranging the squares that I also tacked down with glue dots.   I started in the lower left corner, 2” in from the left side and 1” up from the bottom.  Working across the bottom row, I positioned seven of the squares 1/2” apart.  At the end of this row I added one of the 3 1/2” X 10 1/2” rectangles 1/2” from the final square.  The next row of squares was 1/2” above the first row.  I used a clear ruler to make lining up the rows easier.  I added all five rows this way and also added the other 3 1/2” X 10 1/2” rectangle 1/2” above the first one.  The title rectangle ( 2 1/2” X 12”) was positioned 8 3/4” from the left edge and up 1/2” from the squares.  Lining up all the squares was the most time consuming part of this project.
giant calendar 4 Now you can put your poster frame back together.  Remember to remove the plastic coating on the Plexiglas, mine had a coating on both sides!  The calendar is finished, just start filling in you numbers and appointments OR we can make it a bit fancier.giant calendar 5I opted for fancier.  I used printable window clings to make the months, dates, and some standard things that I would have on my calendar (like Doctor, No School, etc.).  I used a basic word program to type everything out, picked out a fun font (Beyond Wonderland) and printed the clings according to the package instructions.  Everything had to be cut out, but my paper trimmer made that quick.  I stuck all the dates on, the extras are stored on a page protector that I have stuck on the back of my calendar.  I used Velcro fasteners to stick my calendar on the wall, so I can take it down and lay it flat to fill it out for the month. 
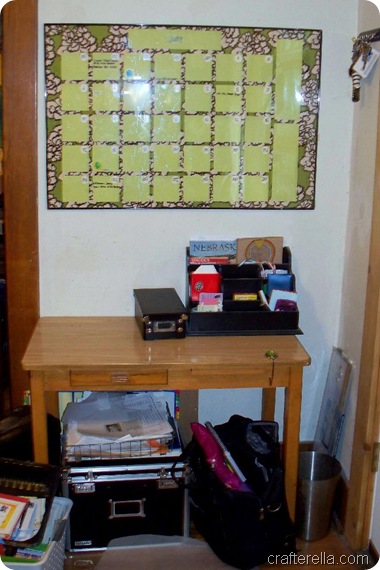
The printed clings make the calendar so neat and tidy.  I followed Bonnie’s suggestion on the Facebook page, to hide the clutter, I can’t afford a new piece of furniture right now, but I CAN cover the piece that is there.giant calendar 6 I barely had enough fabric to make the top match the calendar (there is a small stripe of brown at the back, I was about 2” short).  Yes, hiding it is much better.  The same stuff is under there, but it really looks a lot better, thanks Bonnie!  Now I need to organize that organizer :P and work on the matching paper organizer that is going to hang under the key rack (that is why the table and calendar aren’t perfectly centered on the wall).
Have a super crafty weekend! and if you need any clarification on this tutorial just ask.

5.09.2011

Organized: Clutter Corner

The kitchen is the only area of my house that gets cleaned and de-cluttered daily, however there is one corner that is out of control.clutter corner 1This area is supposed to be for my cookbooks and recipe box.  It is also where I keep our frequently used medicines and reusable tissues.  I have a lot of baking soda for some reason and there is a package of undershirts and a package of underwear in this mix too.  This is really the “I don’t know where to put this so I’ll just shove it here” corner.  The biggest problem is this mess makes it really hard to get to my recipes and plan my meals.
I found this free printable recipe binder cover on Prudent Baby (there are a variety of colors to match any kitchen) and decided to get the clutter corner under control.  Everything got sorted and properly put away and all of my recipe books, cards, magazines, and print outs got hauled to the dining room table to be sorted and stored.  clutter corner 2 I printed out extra cover sheets to make my dividing pages, I added a label over the top of the word RECIPE and I used self adhesive tabs to label all of the category pages.  I used a combination of sheet protectors and photo protector pockets to fill in the book.  It took a while to sort all the scraps of paper out, but it was worth it.
clutter corner 3The recipe books will be filed away in a cupboard, I don’t use them often enough to keep them out, but I do use them enough to want to keep them (for now).  I will be working on the drawers on the left next and hopefully there will be room for me to store my binder away in one of them.  I think the bottom drawer has every kitchen towel I have ever owned in it and I only use the three that match the kitchen, so there might be some room in there.  I also might store the binder with my command center, the recipes for the weekly menu are stored in the menu planning organizer I made, so I don’t need to use the binder in the kitchen daily.  I only need to use it when I plan the menu, which I do in the dining room anyway, hmmm, definitely storing it on the command center (which also need a make over).
I am slowly getting everything the way I want it, now I’ll need to start working on some more decorations for the kitchen.  I have several half finished projects that need to be wrapped up (cough, curtains and giant spoon and fork, cough).

4.04.2011

Organized: Ribbon Storage

I have noticed in the background of a few blogs recently an wonderful way to store ribbon that I have never seen before.   All you need is a swing arm skirt hanger.ribbon organizer 1Swing those arms open and take the skirt clips off (I bet we can find something else to do with them) and slide your ribbon on. ribbon organizer 2 My husband just informed me that his Mother used to do this.  Um yeah, thanks for telling me, I could have been storing my ribbon this way for years!!!  His response was, “I’ve never seen you really work with ribbon.”  My reply was, “I have at least one of every craft supply known to man, you should have known I had ribbon.”  So if you have already heard this tip, sorry :)  Seriously, organized ribbon makes me happy.  Now I’m wondering if there is anything else I could store on another one of these!

3.29.2011

Cardboard Wall Organizer

I knew the moment I saw this organizer that I had to make one with my toilet boxes (I am still working on the first one, I still have one whole box left to use).  It went together really quickly, her template made it sooooooo easy to cut out the pockets, no math or measuring involved!
cardboard organizer back
cardboard organizer front


Wow, that was fast and easy and that’s about when I got lazy.  It seems sturdy, it’s double layer cardboard, I bet I don’t need to add a layer of paper mache, I’ll just paint it and it will be fine.
cardboard organizer painted
And it is fine, but now that I have it up I realize that I want more pockets, I’m going to need it to stand up to some serious paper/magazine storage.  I also need to reinforce it with some paper mache and that will also give me a better base to paint.  So I’m calling this one the test organizer, the actual organizer still needs to be made.  My command center has gotten totally out of hand and I’m going to need all the extra storage I can get. 
I love how the organizer fits perfectly between the door and the corner, yay for using wasted space!  You should see all the stuff that is now stored under that very cluttered table.  I’m definitely doing a before and after shot of this one.  I’ve lived with my original solution long enough and now that I know what I need and what isn’t working I can adjust it to be more functional.
How do you keep your command center organized?  Everything just seems to pile up here I feel like I am constantly de-cluttering.
BTW, I completely forgot that yesterday was Monday (duh), sorry I'm a day late :)

1.03.2011

Organized: Menu Planning

I love organizers.  At the beginning of a new year there are new calendars and organizers on display in every store, this year we’ll start fresh and be really organized they seem to say.   But really all those organizers are all the same and this year isn’t any different than last year.  It seems like the only real difference is the size or the decorations on the cover, I need custom and I need something special that can’t be found in any store I shop in because obviously all those organizers on the shelves don’t work for me!  I going to be sharing all the new organizers and organizing techniques I’ll be trying this year in my new Organized series, maybe this will really be the year I finally get organized.

I bet a few of you snickered when I said I loved organizers, after all you have seen what my house looks like, surely I’m not organized.  I really am, but only when it comes to certain things and still in a cluttered way, if that’s is possible. 

One of the areas that I feel I am somewhat organized at is grocery shopping and meal planning.  I want to go grocery shopping and not have to go again for weeks (well, maybe once a week for fresh fruits/veggies and milk).  In order to do that I have to have a menu, I don’t plan it out by day, but I do have enough recipes for 10 – 15 dinners.  I make all sorts of different stuff, so I don’t have a rotating menu.  Usually I make a few standard recipes and throw in a few new ones too.  It takes me an evening to select the recipes, make the list, round up the coupons and go to the store, but then I don’t have to do it again for a few weeks and I do this late at night after the kids are in bed, there is no way I would take them on this marathon trip!  When it’s time to decide what’s for dinner I check my list and decide and then dig through a mountain of cookbooks, recipe cards, and print outs to find the recipe I need, not the best system, but it sort of works.  There are recipes everywhere and I have been know to misplace a few of them here and there.

When I saw this Meal planning organizer at Little Big Girl Studio I knew that it was exactly what I needed.  The tutorial is very detailed with lots of pictures and her link for adding binding with mitered corners was easy to follow too.menu planning organizerIt went together pretty fast.  I used some of the remnants of that Alexander Henry Tattoo fabric and that super bright orange tie dye fabric and random black fabric and some dark green binding also from my hoard.  The only part of the tutorial that I didn’t follow was the interfacing types (I used what I had on hand, heavy, but no idea what kind) and I didn’t add the magnets.  I plan on keeping this behind the menu board that I made.  Now it’s time for me to make my giant list and get shopping!