Showing posts with label painting. Show all posts

3.12.2012

Monogrammed Chore Charts

We have been wanting to start using chore charts for a while and since this is spring break week and we will all have plenty of time to get used to our new responsibilities I whipped these up.100_7335
I found these half sized, masonite clip boards at the dollar tree ($3) they take paint wonderfully! I lucked into the 6” stencils while I was thrifting last week for $1.75 (I never pass up stencils and these were unopened). The paint and cosmetic sponge I had on had.
I spent 5 minutes stenciling one letter on the back of each clipboard and spent another 10 making custom chore charts using a word program (but there are plenty available for free). I will be hanging these in the kitchen using command hooks with the simple letters showing. I think it will look nice and I won’t have to look at the visually cluttered charts.
I WILL get organized, one little project at a time!

12.19.2011

Keepsake Ornaments

I spent the weekend making our keepsake ornaments. Every year I like to make photo ornaments for myself and Grandma. At the last minute I found this great tutorial to make snowmen photo ornaments and since I was already planning to make the hand print snowmen I decided to make my Mom a set of a dozen new ornaments.snowman ornaments 1Here’s my set, I just LOVE them! Now I need some fancy ribbon to tie on the loops.snowman ornaments 2Here is my Mom’s set. I included some plain round glitter ornaments and some embellished cube glittered ornaments. I can’t wait for her to see them!
I loved making all these ornaments and the kids liked helping a little too. I have a ton of packages to wrap and a special surprise planned for this week, it’s going to be a busy week!!!

10.11.2011

Thrifty Haunted Church

I love finding housewares to alter at the thrift store and when I saw this little light up church I knew that a good paint job would make it into a great Halloween decoration. I love how it’s labeled a church {(snort)}, because I really couldn’t tell (made in China).mini church beforeI painted it all black and then added some navy blue, burgundy, vintage gold, and dark green to high light some of the details. I also used some dimensional magic on the stain glass window panels to make them shiny like glass.mini church after  I think I need to add some glitter, everything is better with glitter, but otherwise I’m done and I have a one of a kind gothic decoration.

8.08.2011

Organized – Labeling Boxes

I spent some time yesterday doing some long overdue cleaning.  Mostly I sorted and filed away all of my patterns.  I had plenty of boxes, I just needed to take the time to sort them out by company and put them in numerical order. 
Today I want to share how I label my boxes.  I used to use a marker to label them, when I got a little more organized I would type up label and stick them on, now I number them.  It is very hard to see in this picture, but there are numbers in the upper right corners of every box.pattern storage boxesOn the bottom left is my master list, each number is labeled with what is in the corresponding box.  My favorite part of labeling boxes this way is if you change what’s in the boxes you don’t need to re-label them, you just edit your master list!  Another bonus is that, if your list is put away, no one knows what is in you boxes, perfect for hiding presents!
I also made some back to school stuff for the kids, the big project was these graffiti style shoes.back to school painted shoesThey are both excited to wear them and I am delighted that they came out so cute.  I followed the Graffiti Shoe tutorial from LilBlueBoo.  When I randomly painted the bright colors on over the white I have to admit I thought I had ruined two perfectly good pairs of plain shoes, but they came out great in the end.
I have several more projects that I want to work on, but if I’m still in cleaning mode I’m definitely going to go with that!  One week until school starts, oh my!

8.01.2011

It’s Hot

Yeah, I know it’s August, but really it seems like it’s hotter than usual.  I have been working on this project all weekend, but I can only stand to be outside about 30 minutes and then I have to come in and cool off.  I’m glad I don’t HAVE to be out in this weather, I don’t do well with hot (but who does?).  Anyway, one down…bowling ball ladybug

7.25.2011

Watercolor Backgrounds

Friday I talked about the inchies (rinchies, & twinchies) I was making and mieljolie commented that she had never seen alcohol used with watercolor, so when I needed to make backgrounds for my instant cemetery cans I snapped a few photos of the process.  watercolor and alcohol 5

3.16.2011

Andy Warhol Inspired Art for $3.88

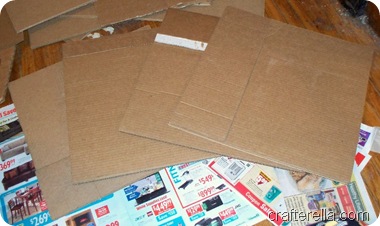
I have had this idea floating around in my head for a while, but buying canvases was a little out of my budget.  When I saw the toilet boxes I knew they would be perfect.  I started by cutting the cardboard into 16” squares, my boxes were double layered so 2 squares equaled four layers of cardboard.toilet box 1aAfter all of my squares were cut I glued each set of two together and weighted them down overnight.toilet box 1b The next day I used paper mache paste to add strips of newspaper onto the cardboard squares,  horizontally on one side and after that dried, vertically on the other side.  Once they were mostly dry I layered them between plastic wrap, so they wouldn’t stick and weighted them to get them nice and flat.toilet box 1c I painted gesso on the fronts and sides and then it was time to do some sketching.toilet box 1dI used a photo of a trooper helmet (Star Wars) and was inspired by the style of Andy Warhol.  I used two shades of turquoise and two shades of orange acrylic craft paint to fill in my design.toilet box 1ePicture hangers will be hot glued to the backs for hanging, they are really light weight.  The only supply I bought was the paint, for $.97 each, the grand total for this project was $3.88, plus my time.  I have been working on this project exclusively since Saturday.  These will be perfect Little Sir’s wall, I wanted something fun and colorful that would last for a few years.  I have to get his room painted next, we’ll be using a light aqua with one orange accent wall.  He wanted all orange, but I thought it might be a bit much.
Not too bad for a toilet box, I have one more project to try with the remaining box, cardboard may be my new favorite medium!

12.31.2010

Year End Wrap Up

I wanted everyone to know that I did knit the toadstool baby rattle from the Purl Bee. It wasn’t finished for Christmas, luckily the baby can’t read a calendar. I still might(probably not) put some appliquéd felt spots on. toadstool rattle I really love it, the detailing with the increasing and decreasing on the stem and the ribbing on the gills is wonderful. I do wish it was a bit smaller, but Little Man is still able to get a good grip on it and give it a good shake, but I think he likes his CrinkleBot better.

I also made a set of hanging towels for my Mother. When she saw my red and turquoise ones she asked for a set in red with yellow instead of turquoise. I had the striping down better the second time around. I am still drinking juice too, 2 down with 4 to go so I can have my very own set of custom ornaments.Marma's kitchen towels

I have a few new projects in the works…days for girls 1 Part of my New Years Goals (not exactly resolutions) and the start of a brand new idea that just hit me as I was thinking about the New Year and getting a new calendar.calendar book 1 I have been working on my goals for weeks and am sure that 2011 will be very exciting for my family, I can hardly wait.

Have a wonderful New Year (and a super crafty weekend)!

10.22.2010

Mushroom Canisters In Progress

In July I scored this awesome vintage mushroom canister set for $10.  The set was a little beat up, but still really cute.  We had a set of mushroom canisters when I was a kid and they really bring back happy memories. mushroom canisters before I love orange, but I really wanted to use these in my kitchen and they just had to be painted red.mushroom canisters during I carefully masked them with tape, I just wanted to paint the orange caps red.  They have been sitting around waiting to be painted for months.  I guess I was a little nervous that I would ruin them, but yesterday was the day!mushroom canisters red paint 1 I used Krylon high gloss paint and did two coats.  Orange to red is a pretty easy transition and the few spots where the coverage could have been better still blend with the red.mushroom canisters red paint 2 The paint did leach under the tape, but I think a sharp razor blade can scrape it right off.

I’m going to use acrylic paint to touch up the white areas where the original glaze is completely gone and maybe add some touches of turquoise.  Then I’ll finish it all with a coat of sealer. Luckily the original glaze is multi-colored and I think the touch up should blend well.  BTW, I’m not using these for flour and sugar, they are for decoration and kitchen clutter storage.  I wouldn’t use them for unwrapped food storage after all that painting and sealing.

I think they’re going to turn out really fun, now I just need to get back to that giant spoon and fork!  Have a super crafty weekend!!!

9.22.2010

New/Old Idea, Fun or Cheesy?

I made these a few years ago and they have been found in the great shuffling of stuff *.  I wasn’t sure if they are fun and folksy or if they are just cheesy and a bit bright.  plaid santa dolls They are stuffed fabric forms that I have painted with acrylic paint.  It’s an interesting idea that I think I might need to explore more, the plaid is a bit loud for me now.  I think that making some Halloween characters would be more Me.  I guess the real question I’m asking is should I sell these or pack them back away into the crafts from years past box?

*Almost every time my parents come to visit they bring me a box of stuff, mostly things they have been storing for me and interesting yard sale finds and I am slowly sorting through all the boxes, bags, and totes and filing it all carefully away.

8.24.2010

Quick Check In

I am training for a new job today and tomorrow, but I wanted to do a quick check in. I mentioned that my art journaling needed layers and that was exactly what I started last night, layer one. I was playing around with a new to me stamp (thanks ChristyNelson.net) and it progressed from there. I was thinking about it as I went to sleep and it came to me, it needed a 3, so here it is:3 - art journal I like where this is going and I can’t wait to add another layer tonight!

8.09.2010

A Great Idea

I saw this really cute PDF for a dry erase menu board and decided that was just what I needed.  Cute and organized, perfect, but wait, I can make one myself (famous last words).

I decided to make mine using watercolors and a crayon resist.  I had been making magic pictures for Little Miss to paint earlier and thought that this would be a great way to keep the negative space white.  I penciled in my design and started filling in all the areas I wanted to stay white with my crayons.  Once that was finished I washed the entire paper with red watercolor.  menu board wet Uh yeah, not exactly what I was going for.  It’s okay, but not the look I wanted.  I decided to sleep on it and see if I liked it better in the morning (I do this a lot, sometimes everything is great with fresh eyes and sometimes not).menu board dry Ummmm, well it’s dry and now kind of pink and blotchy. Surprise, I still don’t like it, but while I was drifting off to sleep I had another great idea of how make look like what I wanted.  This time I carefully measured out all of my lines and rounded my corners using a giant wiggly eye (it was handy, what can I say).  I used slightly diluted acrylic paint to fill in the spaces I wanted red.  menu board take 2 Better, I need to add another coat of paint and, of course, I need to do some lettering.  I think that I will stamp the letters.  I just need to decide what color to use, oh, and I’ll need a frame.

I think I’m on the right track now, and I do like the clean, modern lines in this one.  I’m excited to have a menu board, I like planning my meals, but have gotten out of the habit since Little Man arrived.  The thought of looking at the menu in the morning and knowing what will be for dinner is soooo much better than waiting until four and trying to dash to the grocery store with three kids.  I always come home with a bag full of junk.  Do you like to plan out a weekly or monthly menu?  Does it keep you more organized and do you save money?

7.28.2010

So Many Projects and Not One Done

As you know I am usually working on five to fifty projects at a time, but normally I decide what I will be finishing each week to post here and concentrate on those two or three projects.  Unfortunately this week things came up that disrupted my crafty time and I don’t have a finished project for today, so I thought I’d share some of the things I’m working on.mushroom canisters taped This is one of the treasures that we rescued on our Forth of July junk shopping trip.  I’m trying to make it go with my kitchen vision.  So far plan A and plan B were a total failure, but I’m hopeful plan C will work (I also have a plan D, but hopefully it won’t come to that).  I am waiting to get supplies for plan C, I’m hoping for a 40% coupon from Hobby Lobby next week.poppet legs and arms This was what I thought I would have finished today, but now it is just a pile of legs and arms.  It’s a doll from the famous Craftster Poppet pattern.  I’m thinking I may have this done next week, unless I get distracted (oooooh shiny, yes that really happens to me) or need some special supply that I don’t have.critter parts Here is another pile of parts, knitted parts, waiting to be blocked and sewn into many fun little creatures.  I have finally restocked my yarn and am back knitting again.  Working on number three of four, but thinking I may improvise an extra to make it a family of five.

That’s the main focus of my craftiness this week, I am also working on other things and trying to keep on the cleaning/organizing binge I’ve been on.  Now I have to go clean the kitchen, someone knocked over an entire can of soda and there is sticky everywhere, I’d really rather be knitting!

2.19.2010

An Update: Not Nearly as Exciting as it Sounds

So, I’ve had a minor setback on the curtains, I sewed one of the panels together wrong.  It is not the end of the world and it can (and will) get fixed, however the curtains did not get finished today!  I lost a bit of my momentum when I screwed that panel up.

I did get the paint touched up and the mounting boards bought and cut to size.

Before with the patches from having our home insulated:

Little Miss's room - beforeAfter, I sanded (lightly, they had already done that when they patched the holes), primed and painted the spots and I think the spots are now invisible:

Little Miss's room - after 1I also cleaned up and organized her toys and returned all her brothers toys to his room, she takes them and hides them away while he’s at school.

I will be finishing up her new curtains this weekend, as you can see the paper shades that we currently have are a little worse for wear and one window is completely bare since an incident earlier this week.

Have a super crafty weekend! 

8.21.2009

Day of the Dead Figurines

I know the Day of the Dead is a different holiday than Halloween, but since we are big skeleton fans the decorations overlap for us. I wish I could take credit for this idea, but I found it over at the Anticraft, they have a lot of great alternative craft projects, make sure to check out their archives! I have been wanting to try this project for a while, so I have collected several different figurines. dod figurines 1This one is from the dollar tree, for a dollar I figured it would be a good one to start with. The good news it that if I mess up I can just repaint them black.dod figurines 2 I have three others waiting to be painted, but I need to wait until my little “helpers” are in bed before I start working on these, the wings are going to be “boney” too!

I also hit the jackpot today at Hancock Fabrics, their Project Runway fabric was on clearance, over half off the original price!!! I stocked up, they won’t be getting more and this fabric is perfect for the craft room.project runway fabricI’m planning window shades, a new ironing board cover, sewing machine cozy, crate covers, and who knows what else, yeah I got a lot of fabric.

8.14.2009

Thrifting at the Goodwill

Yesterday I stopped at the Goodwill that near my house, I hadn’t been there before, it’s a smaller store, but it really nice and everything is sorted/arranged very well.  It must have been my lucky day, I found all sorts of treasures!

The one is my favorite, this beautiful cut paper (???) picture, I snatched it up the moment I saw it.thrifted pic

It is really hard to photograph, the glass gives crazy reflections!  Here’s a better detail shot.thrifted pic detailI got all other sorts of stuff, clothes to recon, a purse, some shoes, and some extra special stuff for the 13 Days of Halloween Swap.  There was also some great chairs from the 70’s that were in great shape(I bet they spent their lives covered in plastic), I may have to go back for those.

Here’s a preview of what I’ll be working on next week.  All this stuff is getting repainted.DOD AngelsI also have a big weekend ahead of me, it’s time for Little Miss to get here own room and I need to paint everything, including the ceiling.  The kids are spending the night at my Parents house, so hopefully I will accomplish a lot, see you next week! 

7.29.2009

Fancy Play Food Tutorial (the Easy Way)

My daughter recently received a doll house for her birthday.  It is a homemade one and doesn’t have a lot of accessories, so I decided we needed some play food.  There are a lot of really talented people making miniature food with polymer clay, but I don’t have time to hand sculpt fancy concoctions and I definitely don’t want to spend a lot of money buying something that can be easily lost or broken.

Materials:

  • Scrap polymer clay
  • acrylic paint, like apple barrel or folk art brands
  • acrylic sealer, I would use a spray
  • baby powder or cornstarch to use as a mold release
  • Play-doh sweet creations set (my daughter received this for Christmas, Play-doh has a lot of different sets and there are a variety of different shaped molds so check your sets, ask your friends and keep an eye out at yard sales, these molds work great for polymer clay).   The green and the red ones on the left are some that I found in our collection.play food supplies
Start by conditioning your clay, it need to be warm and soft to produce a good shape.  You can condition it by hand kneading or you can run it through the pasta machine a few times.

Use a brush to apply baby powder or corn starch to the inside of your molds.  Roll the clay into small balls and then firmly press a ball into the mold.  I use my thumb to really get it in there good.  There will be excess clay around the outside edge of the mold and this is what I use to pull the clay out. 

After removing the clay from the mold the bottoms can be rough.  I used my tissue blade to slice the excess clay off.  The piece can be easily sculpted and reshaped, remember this is just play food don’t make yourself crazy making it “perfect”.  Here they are ready for the oven.play food before Bake according to the package directions, mine were supposed to be baked at 275 for 30 to 40 minutes, but I must have bumped the temperature dial on my toaster oven because they came out looking like this.

play food afterI guess it’s good I used scrap clay and was planning to paint them anyway :).

Paint your creations to make them look like real food and then seal with acrylic sealer.play food aboveI was able to whip these up in an couple of days (during nap time and such) and my daughter was delighted with them.  An older child would be able to help you make/paint the shapes, but it was a bit beyond my three year old abilities.  ***Always supervise small children with this play food as it can be a choking hazard.***

7.14.2009

More of The Chica Bag

I worked on my Crafty Chica bag all day yesterday.  Layering the paint to get solid bright colors over that turquoise fabric took forever, but once I was finished with that I couldn’t wait to start embellishing!  I even went outside to take a “well lit, non blurry” photo for you to see.chica bag progress 6 I am still finishing the lettering and the buttons on the banner.  I also have to finish the lettering on the back piece, I might even have time to work on the lining.  Then I will be able to stitch it all together.  I’m sure by the end of the week everyone will be sick of seeing this bag, but I can’t help it, I’m obsessed.  See the other entries on Flickr.

7.13.2009

What I did this Weekend

Last week we had an appointment with the Lincoln Action group, they provide weatherization and during the inspection we discovered black mold in one of our basement walls. Well you know that has to be fixed. Luckily in was contained in a small wall, so this weekend we took the wall down. I cordoned off the area with plastic put on my mask and started ripping it down. My Father was here to help and Marma(my Mother) kept the kids busy. big DIY basement bathMost of the mold was growing on the back of the drywall and there is no way to get it off, so out it went! The mold was caused by moisture in the wall from an old leak that had already been repaired. big DIY basement bath2I sprayed the interior of the wall down with a mold killing spray, we have a dehumidifier running full blast, and in a few weeks when we’re sure the mold is dead and everything is nice and dry we’ll put the wall back up. We will be replacing one of the studs in the bathroom wall, installing an access door for the plumbing, and putting recessed shelving into the family room wall. And that swimming pool blue paint will get painted over too!

I have also been working on my Crafty Chica bag. I have finished the appliqués. Kelly (refibered) gave me a mini lesson on reverse appliqué at our Lincoln Handmade Team meeting last week. I have started the painting. I’m using regular acrylic craft paint mixed with textile medium, it’s taking a lot of coats to get good coverage, but it worth it.chica bag progress 1This is the back, I’m going to have to get a shot of these outside so the glitter vinyl is more noticeable! chica bag progress 2 Here is the front, I’ve finished the white areas and am building up the yellow and red areas.

Once the painting is finished I will be embellishing this further with dimensional paint, glitter paint, rhinestones and maybe some sequins. I also have something super special planned for the inside, so check back. The contest has been extended to the 24th., so there is still time for you to give it a shot! (See the Flickr gallery here.)

7.03.2009

Sketches for the Crafty Chica Challenge

I am working on the painted design for my beach bag for the Crafty Chica Challenge.  I have the bag pattern all ready to go, but first I need to paint the design.  I want to use the “tattoo flash” style that I used for my back patch, but I wanted a new design.chica bag, front

This is what I have for the front, but I think it needs something else/more/different.  I like the top and the bottom, but I need to work on the middle.  I can’t decide if I should add more stuff, start over on the middle portion, or revert back to the design for the back patch.chica bag, back I like the back, maybe the front is just too busy.  I need some advice, what should I do with the design for the front and how does the shape of the bag look?  Leave me a comment and help me decide!