I really expected to be holding a baby by now, but I guess he’s not quite ready. I am officially to the point of making no plans for anything, I can’t even plan dinner. I have a very long list of things that I want to be doing, but I just can’t/don’t want to do them. I have worked on a few things, knitting and crochet are still do-able, but pretty much everything else is out. I miss bending.
Okay, enough whining, I still haven’t finished the Mod Podge screen printing of the fabric for my kitchen curtains, but I have been doing a little work in there. Prepare to see a mess…don’t judge me, I know I have a hoarding/clutter problem and I am working on it. This is my kitchen on a bad day, before the pre dinner clean up. Yes, I have a huge clutter problem. One of the main problems of this kitchen is lack of storage, I need more cabinets. This in the only upper cabinet in the kitchen. There is a small pantry area in the hall and it is very full.
  The right side of the kitchen is a lost cause, there are no cabinets or counter space and I am using a bakers rack in an odd position to hold some necessary kitchen stuff and I keep a cutting board on half of my stove to use as a prep area. Someday we will redo the kitchen, but that is something that isn’t going to happen for a while (think years).
 So, um yeah, I was a little embarrassed by the clutter so I tidied up a bit and this is what it usually looks like. Still not great, but less cluttered. I really need to take those plastic bags to be recycled or make some plarn with them.
 I decided that I needed some shelves above the sink. I wanted floating shelves for a nice clean look. Right now I am ignoring the fact that the walls and ceiling really need to be painted. I picked these out at the Home Depot and while they look nice they are not sturdy. I had read the reviews and knew this was an issue, but I thought it was a hardware/installation issue. I bought special hangers for plaster walls and expected these shelves to be awesome. Sadly they are not, I’m not sure they are going to stay up (as in they may fall down by themselves in the middle of the night). I bought three (notice, I even predrilled the holes for the third shelf) and have only put up two, the third may go back, I’m trying to decide if there is a way to make them work.
 I found some great accessories at Target that are perfect for the kitchen, modern and slightly retro, lots of red with pops of turquoise. I also have been slowly collecting these nice canisters from Bed, Bath, and Beyond, I get them one at a time with a 20% off coupon, they are sooooo nice, but a little pricey. I wanted to store them on these shelves, but I’m not sure the shelves can hold them.
I think that once I get everything arranged and the new curtains and hand knitted towels out and the pot rack hung (once I find it, it’s in the basement of doom) that it will look nicer. If anyone has suggestions for the shelves, let me know, I would really like to make them work. I am also trying to decide how to store my spices without taking up a lot of room, but keeping them handy for use. I’ll keep updating everyone on baby watch 2010, at this rate I might just wait until May!


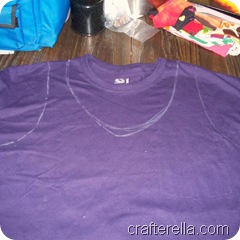


 I put them on the right side of the arm and neck holes and stitched them down. Then I pressed the seams toward the top and edge stitched on the right side. It kind of makes a mini-facing, see the picture.


