Showing posts with label t-shirt. Show all posts

7.15.2011

Tutorial: Braided Neckline

After seeing some braided neckline tops on Pinterest I started thinking about how I could make my own.  It really was easy once I figured out that it wasn’t braiding, but crochet. braided Neckline 7 For this project you will need knit fabric(I used some t-shirts from dollar days at the Goodwill, but next time I’ll start with just knit fabric), scissors, and a large crochet hook.braided Neckline 1I started by cutting the neck band and sleeves off of my tie dyed shirt and making the navy blue shirt into two inch wide yarn (how to here).braided Neckline 2Next I cut 1/2” wide slits around the neckline of the shirt, about 1/2” from the edge.  I then cut another row of 1/2” wide slits about an inch from the edge, staggering my cuts.braided Neckline 3If you know how to crochet this will be super easy, but don’t worry if you don’t, I know you can do this.  In the middle of the back, starting with the row of slits that is 1” from the edge pull a loop of the t-shirt yarn from the wrong side through to the right side using the crochet hook. (I know there are two loops in this picture, I got carried away and forgot to take a photo of the one).braided Neckline 4Put the hook, from the outside of the shirt, into the next hole to the left and pull another loop of yarn to the right side.  You should now have two loops on your hook.braided Neckline 5Pull the second loop you made through the first loop, you have just made one chain stitch.  Continue pulling another loop through the next hole to the left and through the right hand loop on the hook.
Go all the way around.  When you get back to the hole where the first loop came through make one more chain stitch and then work the next row of slits by pulling a loop through the closest hole to the left of where you are.braided Neckline 6When you are finished tie working end to the beginning tail where you started. I know it sounds complicated, but it’s not and if you need help you can ask here or email me.
Things to remember:
  • your slits don’t have to be perfect, they are going to stretch and you can’t tell if they are wonky
  • This technique gathers the fabric, use a shirt that is larger than you normally wear
  • crochet loosely, you want the neckline to remain stretchy
  • you don’t have to used t-shirt yarn, you can just crochet the slits.  This makes a smaller, rigid braid and more gathered fabric
  • after you finish the first round you can switch directions with your crochet so the rows look different (that’s what I did)
  • knit fabric doesn’t fray, so you don’t have to finish the edges, but you can
I haven’t finished this top (hemmed the sleeves or adjusted the length because when I finished the edging I realized that there was a hole in the fabric right in the middle of the front, so I’m going to think on how to remedy that situation.  I might end up making this a bubble dress for Little Miss, we'll see.
Have a super crafty weekend!!!

6.03.2011

The Pieced Tunic from Lilblueboo Review

After looking at all my wishes Wednesday I decided it was time to get working on them.  First up the Pieced Tunic from Lilblueboo, I am a huge fan of her patterns, but this one is her first adult sized pattern, would it be awesome too?  I love all of her sample garments, I wonder how she decides what t-shirts to use?  Maybe she just throws them all in a heap and randomly grabs them.
After taping and cutting out this pattern I decided to alter it to be a bit bigger.  I really like the fitted, body skimming look.  I did not want to look like a sausage stuffed into this top.  I used the slash and spread method to add to the front and the back.  The great things about this method is that the arm and neckline stays the same length, so I didn’t have to alter the bands length too.  This pattern was super easy to alter, no darts or other shaping to redraw.  I also added some length to the top pieces, I hate when my empire waist hits mid-boob.lbb tunic alterationsAs you can see, I added a lot, but too much fabric is way better than not enough.  I did error on the side of too much, but the finished garment is still very wearable.  It is sooooooooooo comfortable and flattering too, this may be my new uniform.  The pattern went together quickly and the instructions were very thorough.  If you like the pieced look this is the pattern for you.  I think I will be using up some of my hoard of $1.00 shirts.lbb tunic front I will have some modeled shots up on Facebook later (after my new dryer gets delivered and installed and I have time to get my tripod set up).lbb tunic back When I make this pattern again (and I will be making several more of this top) I will be changing up some of the alterations, taking the back in a tad, taking a little off the length, topstitching the neck/arm bands, and sewing the armbands on a little differently.
This is the kind of pattern that makes me wish I had a serger, I would churn these out at record speed.  So, in conclusion, I LOVED the finished results, you should definitely get this pattern!!!

5.25.2011

Imperial Trooper Jacket

I absolutely LOVE making clothes from upcycled t-shirts!  It seems like I am constantly bookmarking new projects to try.  The t-shirt to spring jacket tutorial from I Am Momma – Hear Me Roar was one of the projects on my very long list.  I seem to always be making stuff for Little Miss, but not that much for Little Sir.  When I found this Imperial Trooper t-shirt I knew I had to use it to make him a jacket.  I actually purchased a brand new shirt to cut up just for him and his love of all things Star Wars.imperial trooper jacketThe shirt was an extra large adult shirt, so instead of using a premade boys shirt I made my own.  I used the Sienna dress pattern from Lilblueboo like I did with the Little Man shirt, adding a bit of width to the body and a little length to the sleeves.  I also used the custom screen printed fabric I made Monday and fabric that I discharged dyed years ago. 
I really like how it came out, I’m not so sure Little Sir likes it though.  He hasn’t wanted to wear it to school, but it has finally gotten warm.  I’m hoping that by this fall it will be a little less roomy and he’ll be a lot more excited to wear it. 

5.20.2011

From Sketch to Garment

bad religion sketch

The original sketch.

bad religion finishedTo (almost) finished garment.  It looks kind of boxy, but I assure you it will look great on.  Made for a friend, I hope she likes it.

Have a super crafty weekend!

11.12.2010

New Halloween Dress

I am in love with the Sienna dress pattern from Lilblueboo, but sadly it only goes up to a size 6. I wanted one in my size, yeah I know, it’s not really age appropriate and it surely won’t be that flattering, but it will be comfy and a lot of fun. sienna dress - adult sized I figured out how to do it, here it is, hot off the sewing machine! (I hope to have modeled shots soon, the baby is only six months old and unable to work the camera ;D) My first attempt is lying in a heap on the floor (I may go back and work it over some more), but my second try turned out pretty good. I really like the tie dyed ruffle at the bottom, now I need some black leather boots and I’ll be all set. I bet Little Miss will be excited that we have the same kind of dresses.

Have a super crafty weekend.

***edit***

I thought I would add my slightly blurry mirror shot so you guys could see how it fits. sienna dress - adult sized 1 It’s soooo comfy and yes, I know that I am not 12, I don't care! and I will always wear it with sparkly legwarmers when it’s cold (trust me, they're sparkly) ;)

10.20.2010

New Halloween Dress (Sienna Dress)

I found these fun orange shirts on one of my last Goodwill shopping trips and decided to whip up a new Halloween dress for Little Miss.  I used the Sienna pattern from Lilblueboo again (see the other dresses I’ve made from this pattern here and here and here).sienna dress halloween 2 I made the size 5 this time, so she could wear this next year too.  I may need to add some length or maybe a new skirt to the top next year, but right now the length is perfect and it goes with the legwarmers I made.

I really wish this pattern came in my size!

7.14.2010

Post Holiday T-Shirt Yarn Part 2

So, I was sad that my t-shirt yarn curled the design to the inside, but I decided to use it anyway.  It turned out really well, the red and the blue can still be seen, but they are muted and it looks really shabby chic.  I decided to make a halter top for Little Miss, I knew this fabric would look cute with jeans.  What that means is I basically knitted a triangle.  I added some braided straps and picked up stitches along the side to make a strap to go across her back.flag yarn knitted

I was planning on using the leftover stars and stripes fabric to make some sort of ruffled bottom, but when I randomly set the top down on ugly shirt number two it just clicked.  The softer colors on this flag shirt complimented the new yarn better and it would look less Forth of July.flag yarn finishedI think it’s pretty cute, I love working with t-shirts, especially since the edges don’t fray.  I still need to sew the buttons on the strap and check the length of the “skirt” part of the top, but this has been a great success!

I think the next thing I would like to make with t-shirt yarn is a rug for the bathroom, now I need to pick some colors that would look good in there and start stocking up on t-shirts.

7.12.2010

Holiday Shirts, Post Holiday T-Shirt Yarn

It seems like every Holiday has it’s own festive brand of tacky shirt and now that the forth of July has passed there is an abundance of flag themed shirts in the local thrift stores. flag ewwwwMy Mother rescued these two, thinking they were both tie dyed, only one was and it was really more splatter dyed, oh and covered in stiff glitter paint fireworks (don’t worry, I have plans for this one).flag shirt before This flag themed shirt was made into yarn. I really enjoy turning a not so great shirt into some fun yarn and there is a quick and easy way to do it: Start by cutting off the bottom hem of the shirt. Then cut across the shirt from armpit to armpit. You’ll be left with a tube from the center of the shirt.flag shirt foldedHere, you can see, I’ve folded the tube so one folded edge is about an inch and a half past the other fold. Using a rotary cutter and straight edge cut strips one half inch wide without cutting through the top fold.flag shirt strips When you open up your fabric it will look like this, BTW putting it on your cutting mat, like this, is a pain in the arse, I don’t recommend it!flag shirt cutting To make the yarn cut from the first strip, diagonally to the second strip and continue cutting diagonally like this until you reach the end. Cut the first strip (on the right in this picture) to a point.flag yarn stretching To finish your new yarn, stretch it so the edges curl and roll into a ball. BTW if you mound your freshly cut yarn up like this it will end up getting knotted and will take forever to untangle, ask me how I know. I was disappointed that this fabric curled with the printed side of the shirt in, but it turned out to be for the best.

A few tips/hints:

This technique only works on knit shirts without side seams, the seams will pull apart when you cut your strips.

Use a very large crochet hook or knitting needles when working with this yarn. It will make a heavy fabric if knitted on smaller needles.

Wash your shirt before cutting if it is dirty or you’ll end up with dirty yarn.

Knit fabric doesn’t fray, but it does shed little lint balls, it can be messy.

The top and sleeves can also be cut into yarn, but you will have to do it by hand with scissors, cutting in a spiral on the front piece and the back piece minimizes the knots needed to connect the yarn.

Check back later this week and see what I made from these two shirts, and let me know if you have any questions about making T-shirt yarn.

4.23.2010

How to Make a Nursing Top Using T-Shirts

Nursing tops can get expensive once you go beyond a simple nursing cami, so this time around I will be trying to make a few different styles. I have made a tank style, but you can opt to use the existing sleeves and have a nursing t-shirt. I was greatly inspired and influenced by this tutorial on sleepingbaby.net.

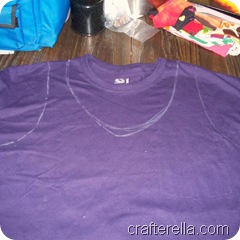
You will need two t-shirts, I bought mine new because I really liked this eggplant color. I removed the pocket and then traced around one of my favorite tanks with chalk.nursing tank 1

If you are making a t-shirt styled top you can skip this step. I will be making the t-shirt version of this and I like to reshape the neck and shorten the sleeves to make it look more like a top and less like a tee.nursing tank 2

Using the other shirt I cut out a matching overlay for the front. I tried the shirt on and marked when I wanted the overlay to end and then used that as a reference when I cut out the bottom. If you are making a tee consult this tutorial. I left the bottom seam of the shirt so I could use it for my drawstring casing. I also cut out two 1 inch wide strips for my ties.nursing tank 3

I sewed the overlay on to the shirt at the shoulder seams. I cut two small slits in the bottom seam on the overlay and threaded a strip through the center to the sides. I pinned the right sides together and sewed the side seams, treating the front and the overlay as one piece and catching the ends of the string in the side seam.nursing tank 4

To finish the armholes and neck edges I cut 1 inch wide strips of the left over shirt. I folded them in half the long way and pressed them.nursing tank 5 I put them on the right side of the arm and neck holes and stitched them down. Then I pressed the seams toward the top and edge stitched on the right side. It kind of makes a mini-facing, see the picture.nursing tank 6

After it was finished I marked where I wanted the nursing openings and cut slits in the bottom layer of the front. The finished tank looks like a tank with a baby doll tie. It’s super easy to untie the bow and lift for nursing access.

nursing tank 7

It would be easy to make this style from knit fabric too. If you do decide to make the t-shirt option it would be a lot simplier to start with premade shirts.

This shirt is finished, but I keep thinking it needs something else, some sort of embellishment, so I may have to work on that a bit more. If you have any ideas or tutorials for other nursing tops let me know! Have a super crafty weekend!

4.21.2010

More Sienna Dresses

I know that I have already shared some of these, but I really enjoy making them.  I have had these cut out since our LNKHandmade team meeting on the 3rd.  I guess my favorite part is shopping for the shirts, it’s a shopping challenge to find interesting shirts that can be reassembled in to adorable dresses.

The minute I saw this shirt I had to have it, unfortunately it wouldn’t fit anyone, but add some hearts and tie dye and it really makes a fun little dress.  Little Miss says she only likes the hearts.sienna dress - jon stewart 1Once you get the hang of this pattern you can really make these fast.  I think I can make one in about an hour and, believe me, I am not rushing.  I have even been using some of the decorative stitches on my machine for the edge stitching.  I have also been using some interesting colors of thread from my giant bag of thread that I got from my Aunt, it seems to have almost every color and I have used up at least 5 spools.sienna dress - jon stewart 2This flora fabric was one of my first purchases for making the Sienna Dress.  I liked the pattern so much I didn’t notice that it was 100% polyester.  It is still a knit, but it does not stretch as well, which is important for the neck binding (I should have used a different fabric for that) and it won’t breathe as well, but it sure is cute!sienna dress - fire and flowers 1The tie dye fabric on the sleeves is from a shirt I dyed myself and wore to death years ago.  Luckily there were still a few usable areas left.  I need to use that technique again, I love how it looks like fire.sienna dress - fire and flowers 2I have almost finished my new nursing top and I’ll have that tutorial to share tomorrow or Friday, now I’m just testing some embellishment ideas, you know I couldn’t just leave it plain, right?

4.01.2010

Thrifty Thursday – Reclaimed Yarn

Last weekend was, once again, $.99 at the Goodwill and I found tons of great treasures.  My favorite finds were these two girls sweaters, they are made from a bulky thick/thin yarn with a hint of metallic running through them and I just had to get them.thrifted sweaters beforeThe pink one is from the Gap and the blue one is from K-mart.  If you are going to unravel sweaters I recommend that you use high quality sweaters, the pink came apart much easier and I was able to reclaim about 95% of the yarn.  The blue one involved a lot of cussing and I only got about 70% of the yarn and the yarn quality was not as good.thrifted sweaters afterI’m thinking that I have enough to make a couple of hats from each color, but I guess we’ll see.  The process of unraveling the sweaters took an evening.  I worked on it while I talked on the phone and watched TV, so it went pretty fast.  I have one more sweater to unravel, a beautiful, cotton, bulky, chocolate brown sweater that I want to make into a bath mat, but I’m going to wait until I finish up some other projects.t-shirts thrifted marchThere were also plenty of fun novelty shirts to be had.vintage house dressI found this great handmade, vintage house dress too!  I remember this fabric from my childhood, not exactly sure where, but I want to say kitchen or bathroom curtains.

I’m taking a long weekend and getting ready for an entire day of crafting Saturday with my Lincoln Handmade Friends and some family time on Easter, have a super crafty weekend and I’ll see you next week!

3.19.2010

Fancy Painted Owls a Tutorial

Painting fabric can be a challenge, but it is really rewarding to make a custom design.  Today I will share the technique that I use and some helpful tips, for this project you will need:

Fabric (I used a t-shirt for this project)

  • acrylic paint
  • textile medium
  • dimensional fabric paint
  • brushes
  • freezer paper
  • Exacto knife
  • iron
  • cosmetic sponge (I buy packs of these at the Dollar Tree, they come in handy for a lot of projects)
  • a design (use free clip art, coloring book images, or you own designs)

For this project I used a purple shirt, to make sure that my colors showed up well and that I didn’t have to paint layers and layers of paint I started off with a stencil of the outline of my design.  I traced it onto freezer paper and cut it out with an exacto knife.  I fused the freezer paper to the shirt using an iron.  I also fused another piece of freezer paper to the back of my shirt to keep the paint from bleeding through.  Using a cosmetic sponge  I applied white acrylic paint mixed with textile medium to my design shapes.  I did two layers, will make a nice base so that my paint colors show up well, if you use a white or other light colored shirt this step isn’t necessary.  At this point I removed my freezer paper, but I recommend that you leave yours on.  If you smudge or splatter paint the freezer paper will protect the rest of your shirt.Painted owlies tute 1A note about paint: I like to use regular acrylic craft paint because I have a lot of different colors on hand, if you prefer you can use fabric paint instead of mixing in a textile medium.  Mixing textile medium with the paint makes it permanent on fabric, follow the directions on your textile medium to get the proportions correct (mine was 2 parts paint to 1 part medium).

After the white base coat was dry I used a pencil to lightly trace my design onto the shapes.  I mix up one color at a time and paint my fabric like a paint by number, doing all of one color before starting on the next.  I still needed two coats of paint on some colors (the pink, yellow, and white), but the darker colors only needed one coat.  Apply the paint in thin even coats, if you glob it on it will make the fabric super stiff and it may crack and peel with wear.Painted owlies 1For this design I painted flat areas of color because I’m going to add texture and interest with dimensional paint.  After the acrylic paint has dried, I waited about an hour, I started adding the details with dimensional paint.  I like the tone on tone effect, so using different textures I layered on the dimensional paint.  Dimensional paint is really fun and inexpensive and a great way to add some interest and bling, you’ll notice that some of mine has glitter or pearlescent additives.  I also like to use it to add embellishments like rhinestones and wiggle eyes, although I didn’t add any of those to this project.

I add two colors at a time and allow to dry thoroughly before starting the next colors.  I don’t want the lines to bleed together and I don’t want to risk smearing the colors.Painted owlies tute 2Tip: test the paint on scrap paper or your hand (like me) to keep it from globbing out on your fabric.  The tips on these paints are easily clogged, especially the glitter ones, and nothing is more upsetting than a big glob of paint in the middle of your project.  If you do accidently get a blob of paint try to carefully remove it or reshape it with a brush, if you are doing tone on tone it will be almost invisible.Painted owlies tute 3Allow everything to dry and heat set according to package directions, usually iron on the back using a press cloth.  I also like to wash my fabric once before wearing or gifting, but that is more of a personal thing.  I have to wait a week before I can wash this fabric (yeah, that what my textile medium says).  Now you all finished, you can wear this shirt or, like me, cut it up and make something new!Painted owlies tute 4As you know, I have been working on these painted owls almost all week and it seems as if this project just didn’t want to get done!  I think it’s almost ready to be cut up and sewn, but I would love some feedback, should I leave it as is or should I outline the owls in black or maybe turquoise?

Have a super crafty weekend and I’ll see you next week!

3.11.2010

Another Lilblueboo Pattern

After enjoying the Sienna Dress pattern so much I decided to try the Lil Leggings pattern and, once again, I was not disappointed!  Nice straight forward instructions and a great selection of tips to make different styles.  The pattern recommends a knit fabric with 75% stretch, I used a less stretchy fabric and upsized the pattern a bit.  The result are some cute leggings to match Little Miss’s new Sienna Dress.sienna dress - Catrina

You should recognize all of the fabrics, they are from my thrifting adventure last week.  I know it may seem a little out of season for a Catrina, but she will be wearing this all spring and summer, what can I say, we’re a year round skeleton family.

Little Miss really likes these dresses and when she finds out that I’m making her a new one she hovers around waiting for it to be ready to try on.  It’s exciting for me that she really wants to wear the little dresses I’m making.  I think I may just have to buy all of the Lilblueboo patterns, there are so easy and stylish.  We get a lot of compliments and people are amazed that these are handmade.  If you have a little girl to sew for I can’t recommend these patterns enough.  Make sure to stop by The Lil Blue Boo blog as well for some great tutorials for embellishing you fabrics for a more custom look.

I have some other great girly tutorials to try, but I just can’t stop making these knit dresses, I wish the pattern came in adult sizes.  I have been eyeing the Halter/Tie back dress pattern for this summer.

3.09.2010

Pythons

The first Thursday of the month is when we have our Lincoln Handmade Etsy team (facebook fan page) meetings.  They’re a lot of fun, full of crafty gossip, eating, knitting, crocheting, and other craftastic fun.  This month the team gave me a baby gift: a thrifted t-shirt and a Hobby Lobby gift card.  We had a good laugh about the shirt and this is what I turned it into.

pythons baby gownThis is the third gown I have made and once again it was really easy.  It took me about 1 1/2 hours from start to finish and I was not hurrying.  I used red thread to coordinate with the pythons and I really like the way it stands out on the finished gown.  I have to confess that I am totally addicted to sewing with knits, I just can’t stop!

Thanks Lincoln Handmade Team for the awesome shirt and gift card, I’ll giggle a little every time the little man wears it!

3.04.2010

Thrifty Thursday – Goodwill Treasures

I had a great weekend of thrift shopping, if you remember it was $.99 day at the Goodwill last Friday and Saturday. 

I found a great selection of striped shirts, a few tie dyes, and some plain colors for matching.  I also found a great orange dragon shirt and an interesting gaming shirt, it had Yoda and Darth Vader, so I had to get it.thrift store finds Feb 2010 1 There were also several fun printed shirts, like Sponge Bob with “I’m Ready” on the back, an awesome bleached Catrina shirt, a Jon Stewart shirt, and a fun sarcasm shirt.  I had an Aqua Teen Hunger Force tee too, but my husband snapped that up.  I’m thinking that the Catrina shirt would look great with that orange and black tie dye.thrift store finds Feb 2010 2 I also found this cute women’s tank top.  I love getting these, they are so easy to convent into dresses for Little Miss.  I just have to take in the sides and shorten the straps.  I especially liked this top because of the cute little pockets.thrift store finds Feb 2010 3 It was a great shopping day and I probably would have come home with a lot more if Little Miss hadn’t been with me.  She has now started hiding in the clothes racks, so I look like a crazy lady talking to the clothes while really I’m just trying to get her to come out.  I also bought the cutest little doll cradle, for $4.00 I couldn’t pass it up.  I would look nice with some paint or maybe some decoupage, we’ll see what happens.

2.10.2010

Little Man Shirt

I noticed that the Sienna Dress pattern (from Lilblueboo) was pretty unisex and I decided to make Little Sir a shirt with it. I had the perfect polo shirts to use, orange with stripes, we love orange! I used the tapered sleeve and made the body of the shirt slightly boxier and shorter. Little Man ShirtSuccess, I love this pattern! The neck looks a little wonky, but I’m hoping that washing it will fix that. I used the collar from the polo shirt and one side had fusible interfacing firmly attached, so the neck line didn’t stretch as well. I have enough of the strip fabric left over to make some sleeves for another baby gown, now I just need a navy blue shirt to cut up, I think I will be making a lot more reconned clothing for my family. No knit shirt is safe!